
Where do you normally study? If the answer is “lying in bed with my laptop propped on my knees while eating deep-fried Cheetos,” then you might want to consider revamping your study space.
And that’s what today’s post is all about. We’re going to look at how to create (or find) a study spot that lets you get in, do your best work, and then get back to having high density fun.
We’ll examine the different types of study spaces, the do’s and don’t’s of study space creation, and the key principles to make sure your study space does what it should: help you study better. Finally, we’ll give you some examples of study spaces that put these principles into action.
Let’s get started!
The 4 Types of Study Spaces
Most of this post will be about how to create a semi-permanent study area in your dorm room or apartment. Before we get to that, however, I think it’s good to look at all the different types of study spaces you (probably) have available to you as a college student.
1. The Library
When I was in college, I did most of my “serious” studying in the library. If I needed to really focus and crank out a paper or prepare for a serious exam, the library was my go-to. Where in the library I studied depended on what I was trying to accomplish, but generally I looked for a place that met the following criteria:
- Quiet. Most college libraries, mine included, are divided into different noise level zones. Mine ranged from “collaborative” (talking at a normal volume allowed) to quiet (whisper only if necessary) to silent (don’t you dare even cough). I usually went with quiet and then put on headphones to block out extraneous noise.
- Spacious. That is, enough room for me to spread out all my books, external mouse, computer, writing materials, and snacks. Ideally, I would grab one of the common area tables on the first floor of the library.
- Empty. This one was a bit trickier, but I tried to find a place that didn’t have a lot of foot traffic or other distractions. Because if I was looking up every five minutes to say hi to someone I knew, it wouldn’t be a very productive session.
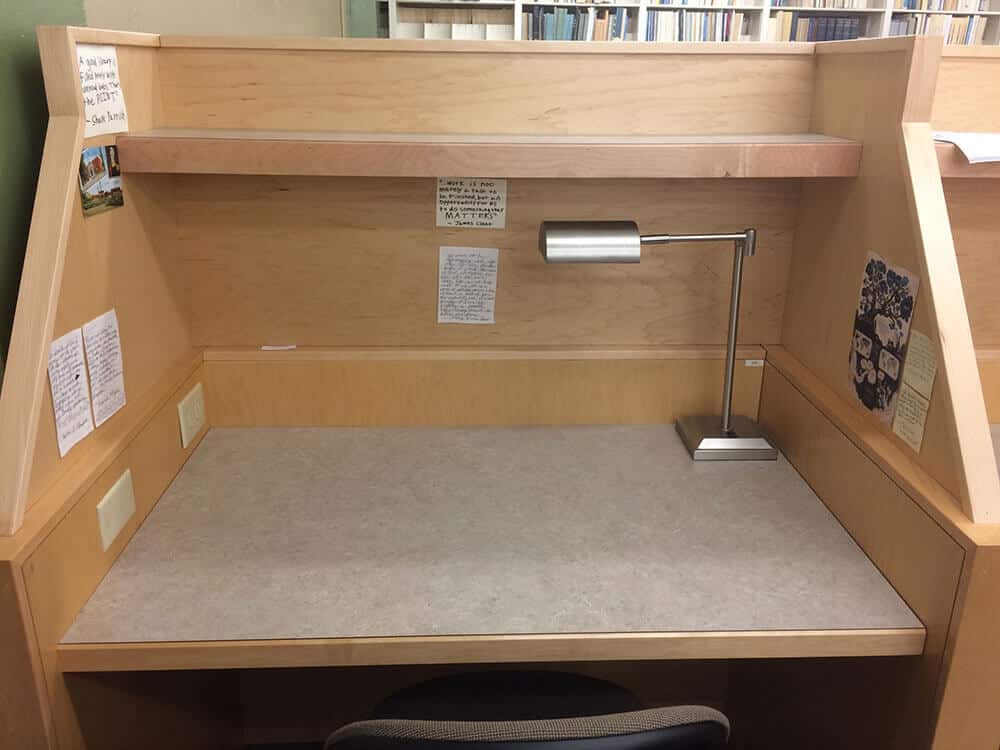
During my senior year, this was even easier, because all seniors at my college received a dedicated “study carrel” (pictured above) to give us a place to work on our Senior Independent Study projects.
But even if you don’t have a space like that, you can still carve out a little nook of the library that feels like your own. Find a part of the library that no one really goes to and use that.
For instance, there was the dingy basement part of my college’s library called “Andrews Lower 2”, which was really just the storage area for the USGS maps and political documents. It made for a silent and secluded, if creepy, place to study.
2. Academic Buildings

For the right subject, academic buildings can be great places to study. Some departments even have study lounges or “labs” devoted to their particular subject.
For instance, my college had a “math lab” where you could go work on your math homework and have tutors available to answer any of your questions. There was also a similar area for all STEM students. If you’re taking a class in one of these disciplines, I would strongly encourage you to use all the resources the particular department provides.
Furthermore, studying in an academic building can be very useful when you’re preparing for an exam. As Thomas explains in the video below, simulating the test conditions is a great way to combat test anxiety and boost your recall of information through context dependent memory.
Basically, if you can find out where the exam will take place and then do a few study sessions in that room, it can help boost your exam grades.
3. Miscellaneous Places on Campus
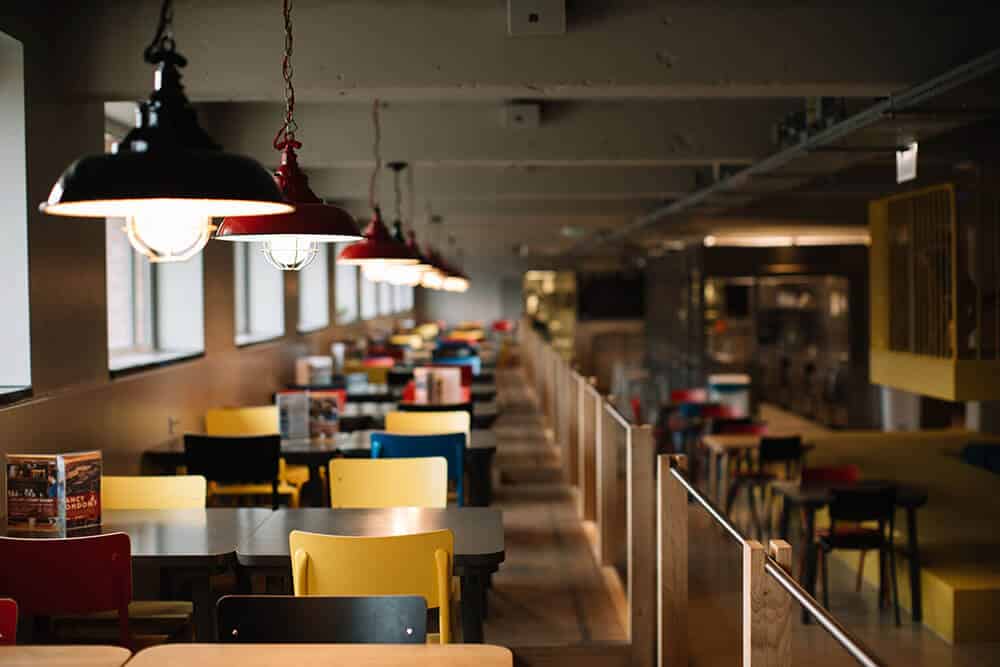
I won’t spend a ton of time on this one, as I think there are generally better places to study, but I had some friends who did all of their studying in places that were neither the library nor a dorm. These included places like the student center lounge, under a tree on the quad, or even the dining hall.
Personally, I could never get much serious work done in a place like this (too many distractions), but if it works for you, then go for it. These can be good places to meet for collaborative work, though even then I would suggest that a common space in the library would probably be better, since it has a more studious atmosphere.
4. Off-Campus

In some cases, you may want to ditch campus entirely. During my senior year, I got some of my best writing done at a coffee shop off campus. It was ~20 minutes on foot from my house, so when I got there I made sure I didn’t waste any time.
It was a place I went just to work, and in that sense it was almost like an office. An office with soft natural lighting, warm wood furniture, and delicious drinks and snacks.
Of course, you don’t have to go to an off-campus coffee shop to get away. Check if your college town has a public library. This can also be a great place to study, as you’re less likely to run into people you know and it can get you out of a creative rut that might come from only studying on campus. Plus, having access to an additional library system can be a super useful for research.
4 Steps to Create a Study Space in Your Room
Now that we’ve covered the other possible study spaces available to you, let’s get to the meat of this post: how to create your own study space. I’m going to assume that, for most of you, this will end up being a part of either your dorm room or your bedroom. If you have another area to dedicate to it, though, then by all means use that.
In order to create a study space, follow these four steps;
- Remove all distractions.
- Have easy access to everything you need before you start.
- Experiment with lighting.
- Adjust your study space to the ideal temperature.
1. Remove Distractions from Your Study Space

As in so many areas of life, it’s useful to start with what to leave out and then add things from there. Naturally, what puts you in a studious mood will differ from person to person, but here are some things you should probably avoid in your study space:
- Video games.
- Your phone.
- Lots of open tabs (link to study apps for students that can help avoid this).
- Multiple monitors unless it’s really imperative to your work (a separate external monitor is fine if you’re using it as your main screen or as part of a standing desk setup).
- Messy food/drinks/junk food.
- Other people (unless you’re working on a group project, in which case you should be working somewhere else).
These are all things that, while fun or even productive-seeming, are ultimately distracting. The goal of a study space is to maximize the attention you can devote to studying while minimizing the amount of effort necessary to do so. You can’t do that if the space is full of distractions.
2. Have Easy Access to Everything You Need Before You Start

Now that we’ve gone over what to leave out, let’s get to what to include. This is a long list, and much of it depends on what exactly you’re studying.
For instance, you’ll need different materials for writing an English paper than for preparing for a chemistry exam. To help you out, I’ve divided the list into two sections: essential and optional items.
Essential Study Space Items
- Comfortable yet ergonomic chair or standing desk. If you’ve never tried a standing desk setup, I strongly suggest trying it. It’s been a game changer for my productivity and health. Here’s a list of our favorite standing desks (including DIY options).
- If standing, something soft to stand on (a yoga mat or soft rug works great).
- An external mouse (it’s way more ergonomic than using the trackpad).
- Your computer, if necessary.
- Textbooks or e-reader with relevant books loaded.
- Notebooks.
- Index cards.
- Pad of paper to write down distracting thoughts. While studying, you’re bound to have “great” ideas or just to remember stuff you need to do like laundry or emailing a professor. Don’t let these thoughts distract you–just write them down on the paper to get them out of your head and let you review them later.
- Plenty of writing utensils appropriate for the subject (mechanical pencils for math, etc).
- Calculator or other subject specific tools as necessary.
- Good lighting. If you can’t see your paper, it will be harder to work and it will make reading more difficult. Natural light is best, but a good desk lamp can make a world of difference as well.
Optional Items
- Whiteboard and dry erase markers (not essential, but super helpful for practicing math, sketching out designs, brainstorming essays…I could go on).
- Tactile thinking aids. For example, a Rubix cube, some putty/clay, or even just a pen to click. These are great because they give your hands something to do when working on a tough problem, helping you engage your brain’s non-linear, pattern matching R-mode (for more on this concept, check out Pragmatic Thinking and Learning)
- Tea, coffee, or water.
- Healthy snacks that don’t make a mess (nuts, banana, granola bar, carrots, dried fruit, etc). These help keep your blood sugar up, ensuring that you can stay in the “flow state” for longer.
- Inspiring decorations. Like a low maintenance plant or a cool poster. I personally have some inspiring quotes written on index cards.
- Paper calendar. This is way more helpful than you might think. For example, when you’re writing an essay and need to check the date without distracting yourself by going on Google or looking at your phone.
- Study music or ambient noise (I suggest Rainy Mood or Coffitivity)
- A kitchen timer. These are helpful for Pomodoro sprints or other time oriented drills.
- Headphones. Great for blocking out distractions wherever you are.
3. Pay Attention to Lighting
I don’t know about you, but sunlight tends to energize me and get me excited.
According to a German study that looked at the effects of color temperature and brightness on the productivity of students at the Cologne University of Applied Sciences, researchers found that the students were more creative under warm light (3000k), yet concentrated better under cold light (6000k).
To put this into action, try to study near a window, so you have some natural light coming in.
Another tip is to experiment with different brightness levels and color temperatures until you find something that works well for you. And no, you don’t have to buy a gazillion lightbulbs from the hardware store to figure out what works best for you — you can just get a lamp with a dimmer and play with the switch.
Lighting is especially important if you’re reading from a paper textbook or doing other paper work (such as math problem sets). If you’re having to squint at the book, then you probably need more light (or glasses). A desk lamp is a worthwhile investment in this case, as the overhead fluorescents in most dorm rooms are often too diffuse to give you the clear, focused light required for reading.
4. Adjust Your Study Space to the Ideal Temperature (if possible)
Aside from color temperature, the actual warm-cold temperature of the room you’re in is also a big factor. Not only can an environment that’s too hot or cold cause you to be consciously distracted, but it can also cause you to make more mistakes in your work unconsciously.
Researchers at the University of Helsinki and Lawrence Berkeley National Laboratory reviewed several studies on how temperature affects office worker productivity. They found that, on average, productivity is highest in a temperature range between 72°F and 77°F (22°C and 25°C). Below or above that range, errors increase.
You won’t always have control over the temperature of your study space (looking at you, arctic dorm room air conditioning), but do what you can to get the temperature into this ideal range. If it really is unbearably hot or cold, then it may be worth it to temporarily move to another study area that has a more pleasant temperature (such as the library or student center).
General Study Space Tips

I know, that previous section was a pretty long list. While certain items are key to creating a study space, don’t lose sight of the real goal. Because when it comes down to it, creating a study space is all about the way it makes you feel. It’s about what puts you (and no one else) in a studious mood.
In addition to having the right materials, here are a few more principles that will make your study space (and study time) more effective:
- Make sure all your study materials are functioning. Do this before you start studying. You can get derailed easily if something stupid happens like your pen isn’t working, your pencil runs out of lead, or your computer isn’t charged.
- Make your study space ergonomic. Don’t slouch, keep your feet on the floor, position your screen at eye level (otherwise you’ll wreck your neck), and type with your wrists in a neutral position. For an illustration of this, have a look at this graphic from Zapier.
- Keep your study space as clean (or messy) as you like. Some research suggests that messy spaces can be better for creative work, since they encourage unconventional thinking. Other productivity experts swear by a minimalist, decluttered desk. Really, I think it comes down to personal preference. If a cluttered study space works best for you, then rock on. If you can’t stand to have things messy, then don’t. I would, however, suggest you experiment with both ways, as the results might surprise you. Whatever you do, don’t let old pizza or take out boxes pile up–that’s just gross.
- Take breaks every 30-60 minutes. Besides being good for your health, regular breaks also boost your productivity and focus.
- View your study space as a WIP. Don’t go out and buy everything we suggest in this article. Try one or two things and see if you like them, then add from there. Remember, the ultimate goal is to make your study time more effective, not to create the best workspace just for its own sake.
- Make the best of the space you have. Especially if you’re in a dorm with a roommate, it can be tricky to get everything perfect. You have to work with the furniture that the university provides you, as well as your roommate’s preferences. But don’t let that discourage you–view it as a reason to get creative.
Want to learn how to study effectively once you’ve set up your space? Check out this list of the best study tips.
Our Favorite Study Space Examples
To round this guide out, we want to show you some of the principles we discussed in action. We asked members of the CIG team and real students like you to submit photos of their study spaces. Below, we’ve pulled some of our favorite examples for your reference.
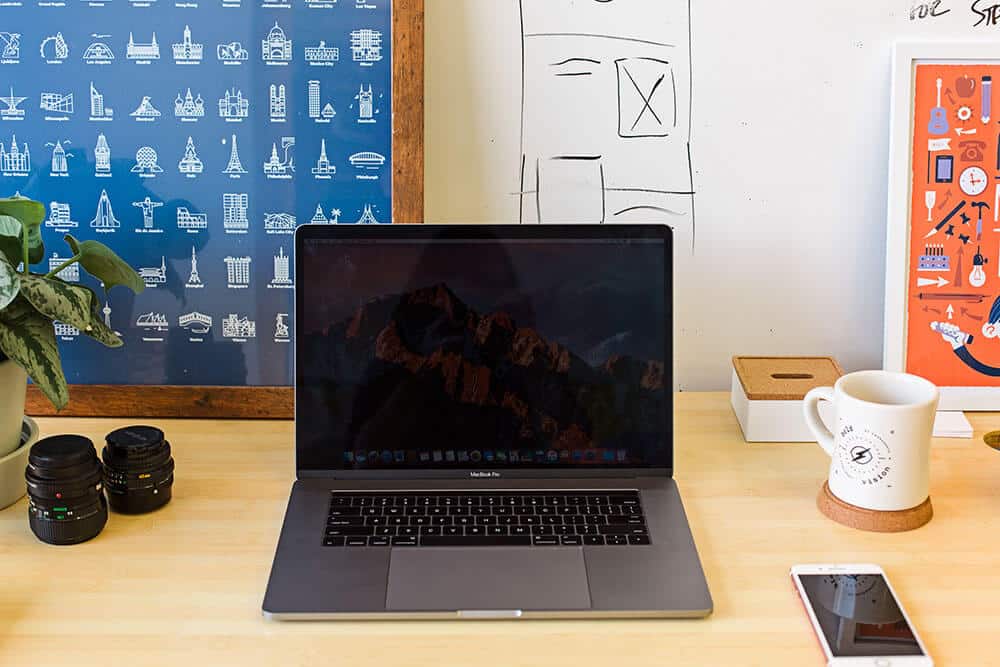
1. Martin’s Minimalist Zen Study Space

CIG developer/computer mage extraordinaire Martin’s workspace is an example of clean minimalism. The lighting is on point, and the meditation area provides a place to take a break. Also note how the monitor as at eye level in order to prevent neck and eye strain.
2. Thomas’s Dual Monitor Command Center
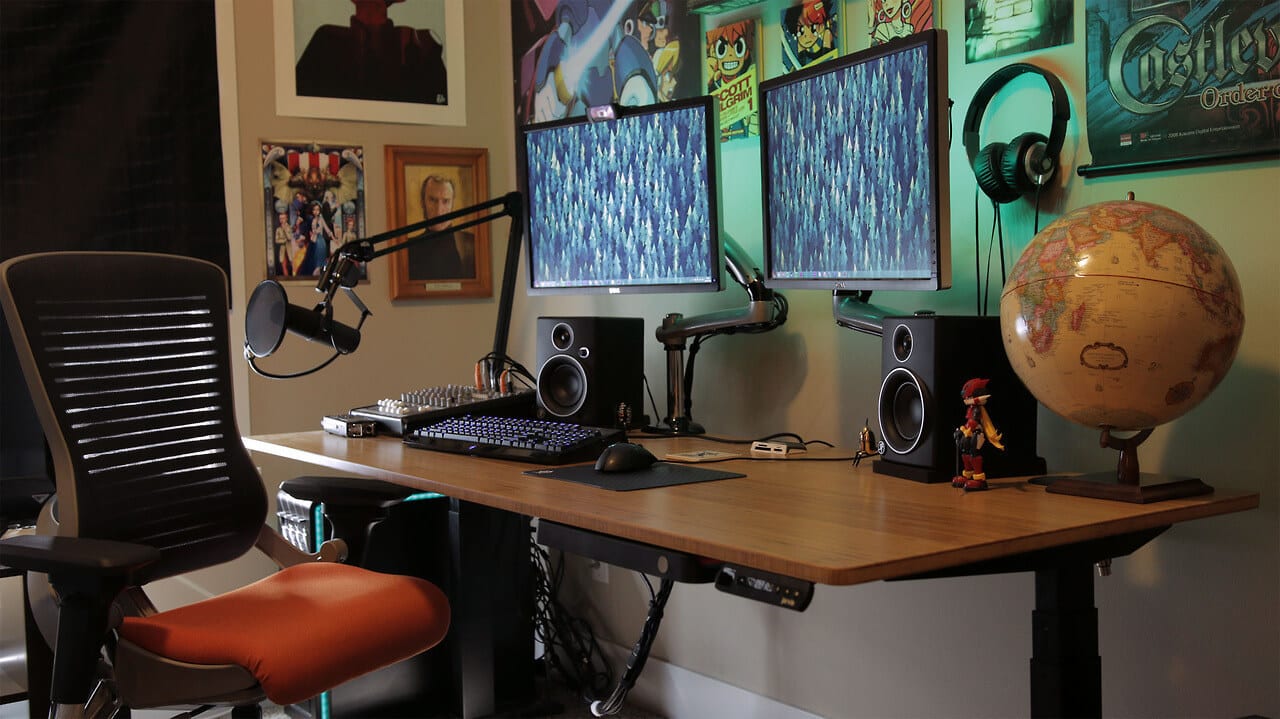
From the original College Info Geek himself, Thomas’s setup shows that minimalism isn’t the only way to go. The space is tastefully decorated without being cluttered, and the abundance of audio equipment and dual monitors create the ideal environment for video and audio editing. Also, note the carefully controlled lighting and masterful cable management.
3. Portable Study Space
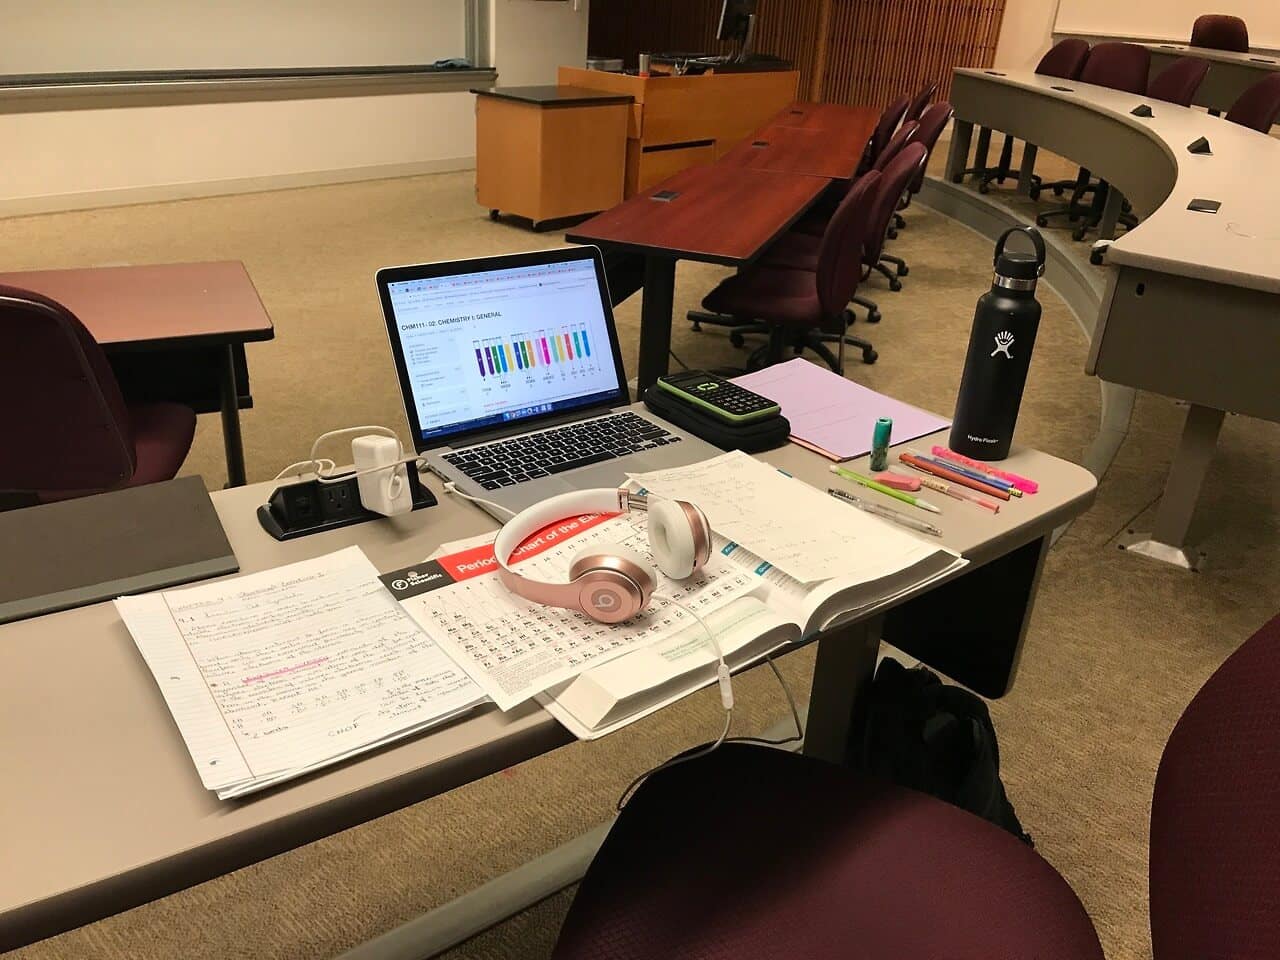
Of course, we don’t all have the luxury of a dedicated office. This reader-submitted example shows that you can create a study space wherever you go.
Note how they have water close at hand and all their writing implements assembled. In their submission, they note: “On the weekends I turn my empty lecture hall into my own private office.”
4. Law Library Paper Writing Station
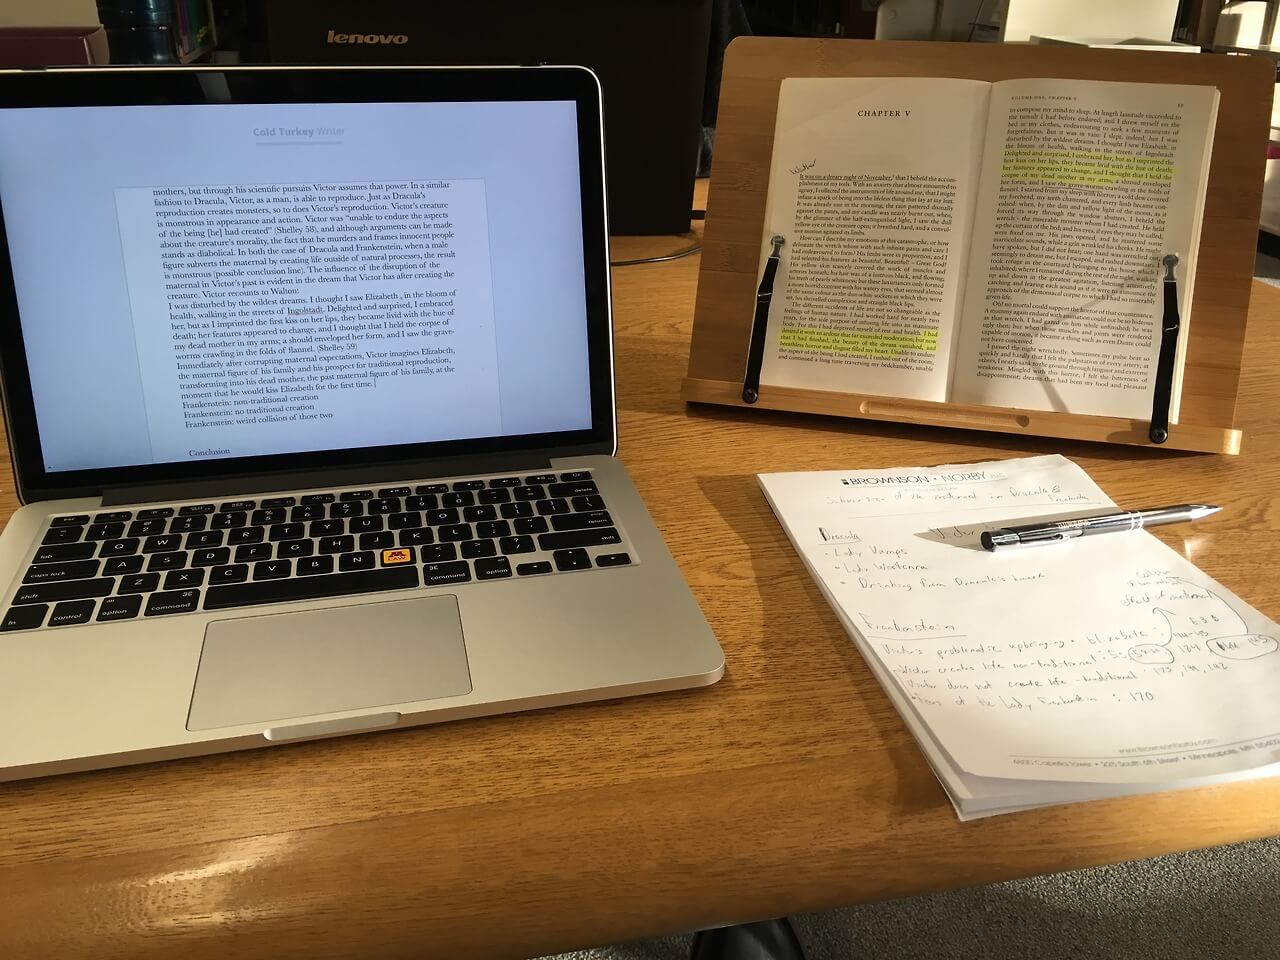
This setup is a perfect example of how you can create an effective study space in your library. We love the book stand as a way to prevent neck strain and the dangers of using pizza as a paperweight.
As the submitter notes, ” Location: study table in the UMN Law Library, because my apartment is too small to have a nice desk setup.” Goes to show that the size of your dorm room or apartment doesn’t have to limit you.
5. Loft Bed Study Nook
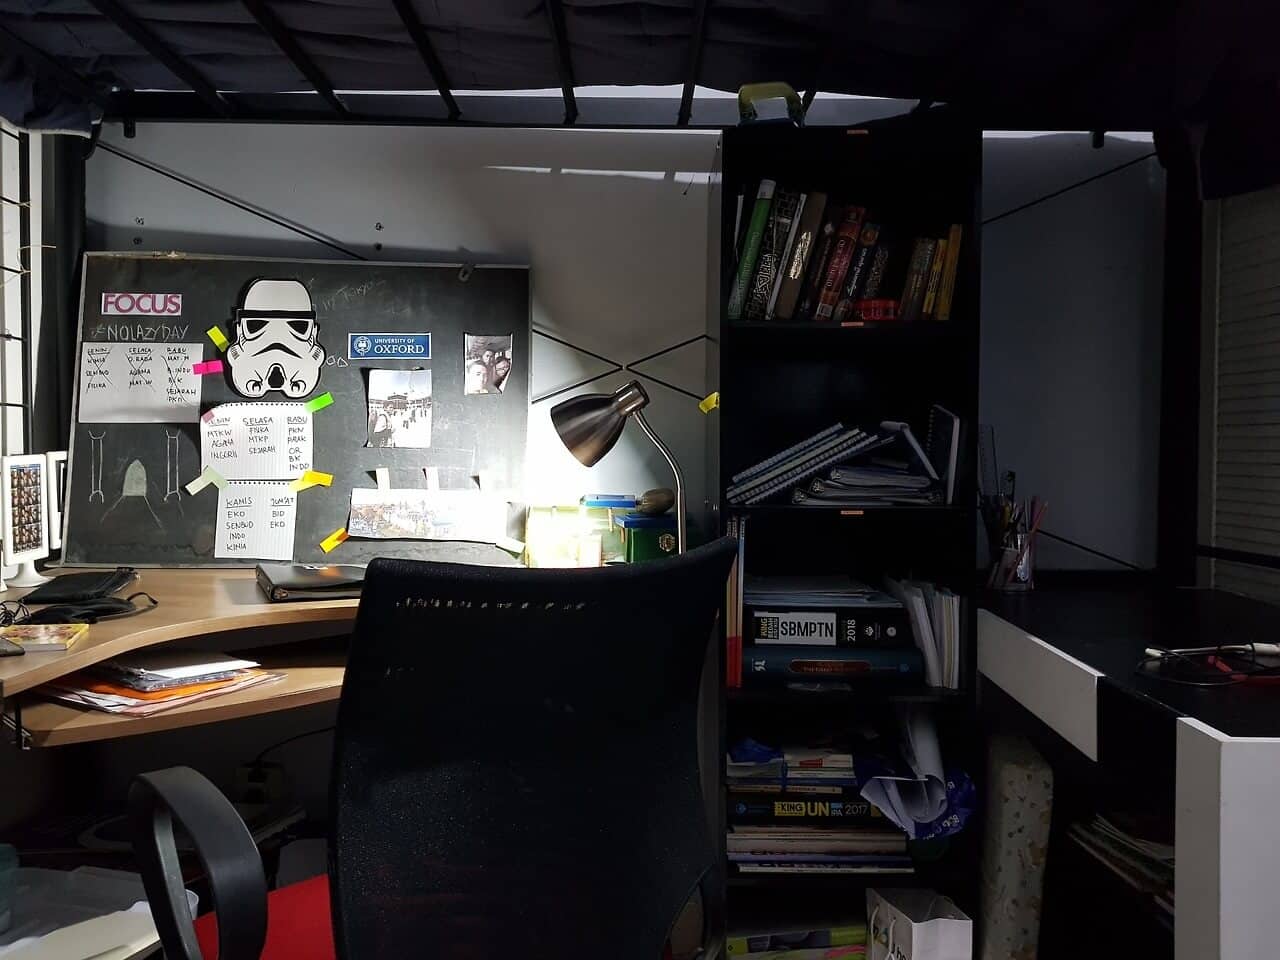
While the submitter describes it as a “super messy study space”, we think this submission is a great example of how to use the limited space available in your average dorm room.
Lofting the bed frees up space for this cozy desk and bookshelf arrangement. Note also how the chalkboard has room for both motivation, organization, decoration, and the Dark Side.
Further Study Space Resources
I hope this guide has given you some inspiration for how to create the study space that works best for you. I said it before, but I’ll say it again: don’t let creating your perfect study space distract you from what really matters: studying.
If you’re not careful, this can become another form of productivity porn or procrastination. The perfect study space does not exist, and creating it shouldn’t be your goal. Of course, reading this article could also be a form of procrastination, so once you’re done–get back to work! Or, you know, go outside or do something fun.
If you want to see some of the tips in this article in action, here are some further resources to consult:
- How to Create a Study Space in Your Room – Check out the workspace setup of CIG podcast co-host Martin Boehme.
- My New Room and Workspace – A tour of Thomas’s new baller workspace.
- How to Make Studying Fun (or at Least Less Boring) – Some more tips to create a space (and mindset) that will get you in the right study mindset.
What’s your study space like? Share it in the comments below, or discuss it in the College Info Geek Community (bonus points if you include a picture).
Image Credits: featured image, cafeteria, coffee shop, video game controller, studious desk, general study space