
There are many reasons to improve your photography.
You might want to capture and collect memories and moments. You might be looking for a fulfilling new hobby or profession. You might wish to reconnect with nature and patience, like I did. Or, you might simply need a new way to create art.
Photography can handle all of that and more, but it has two distinct problems that not all new activities face:
- It can be overwhelming to a newcomer. This is especially true when deciding on what equipment you need to get started.
- It can be very expensive.
Luckily, these complications can be managed or avoided entirely, depending on what you want, so I’d like to take some time here to simplify things. We’ll go over how to choose a camera, a few tips for taking good photos, some other helpful equipment to have, and a few ideas for what to do with your photos when you’re done.
So, first and foremost:
What Camera Should You Buy as a Beginner?
If you’re looking for an easy answer and you have the budget for it, I absolutely love my Sony a6000. There are newer models, but honestly it won’t make much of a difference, especially for a beginner.
If you’d like to think it over a bit, here are some good questions to help you along your way:
How much do you want to control and create your photos vs. take snapshots?
If you just want to capture memories or share the cool places you come across, keep it simple. Just use your phone, or get a point-and-shoot camera like this one. Don’t pay for something more complicated than you need! With skill, you can take great photos with both — no judgement here.
If you’d like to have more creative control, you’ll likely want a DSLR or mirrorless camera. Mirrorless is the newer technology, but you can take equally good photos on either. A potential downside is that some mirrorless cameras don’t have a viewfinder, forcing you to use the back screen only. I absolutely recommend having a viewfinder. It removes the risk of glare blocking your screen and gives you a better idea of what’s going on in your photos.
Mirrorless cameras are also likely to be lighter, if that’s a concern. In fact, that was a huge consideration for me in the beginning, as I was working through some severe nerve damage at the time.
Other than that, the choice is mostly up to personal preference. Both will let you use different types of lenses and control things like aperture, shutter speed, and ISO. Both can help you become a great photographer.
How much money do you have to spare?
If I were starting a new hobby like this, I probably wouldn’t buy anything more expensive than the a6000 I mentioned earlier. It’s a new hobby, and furthermore, you do not need expensive gear to take good photos.
You can be a terrible photographer with a $10,000 camera and lens, or a fantastic photographer with an iPhone. I’ll get more into what makes a good photo in my opinion later, but rest assured the answer is not money.
Do you already have access to any cameras or lenses?
Camera companies don’t want to lose customers. Due to this, companies like Sony, Canon, and Nikon all have their own lenses and accessories. Lenses can easily cost two to three times more than the cameras, meaning you won’t be able to easily switch teams later.
So, if you expect to inherit a few high-quality Canon lenses, it would be easier and more intuitive for you to go with a Canon camera. Megapixels aside, the lenses end up actually being more important than the camera body itself.
That isn’t to say that you can’t find adaptors that let you use other lenses. But you might lose helpful features like autofocus, or more obscure things like having your camera tag what lens you were using, which can help with development later.
Do you need to buy a camera right away?
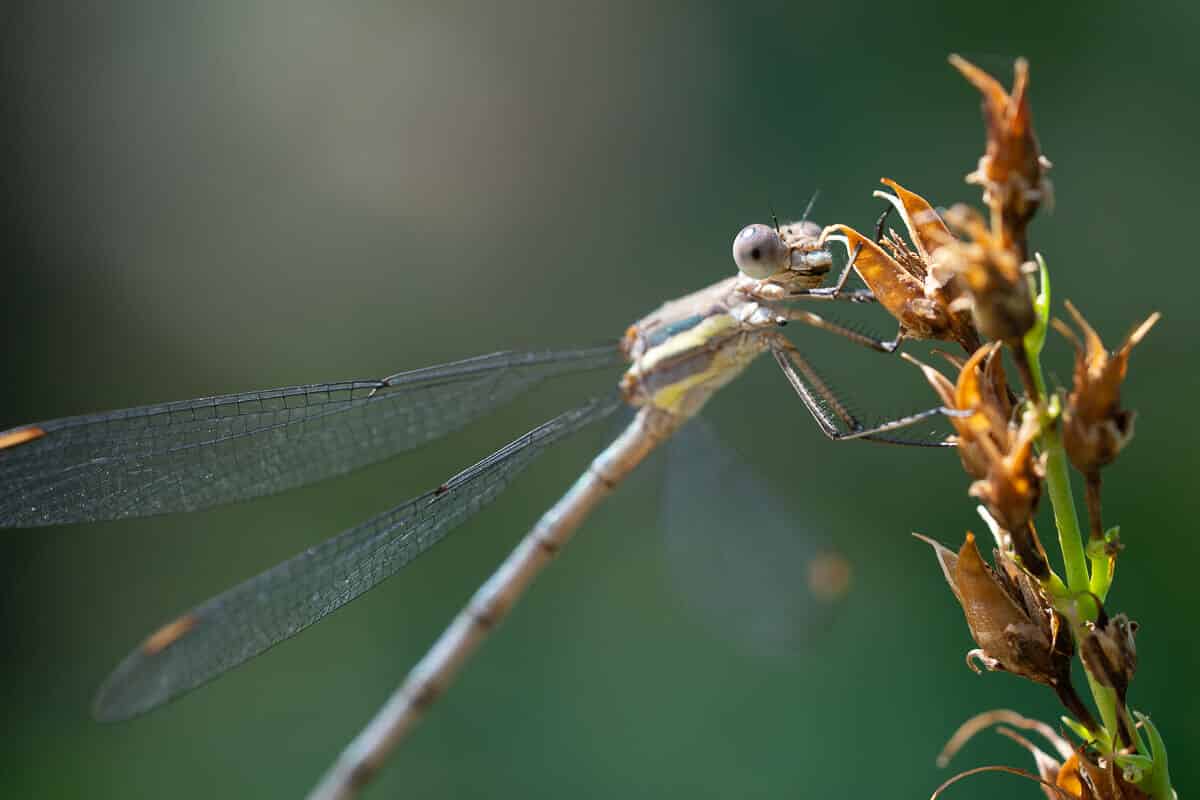
I borrowed my now fiancée’s simple point-and-shoot camera for several photo shoots to see if I’d enjoy it. My photos were nearly all terrible, but I did discover an interest in insect and arachnid photography.
You can also rent camera equipment. It’s amazing for trying out new lenses, and I highly recommend renting something before buying it. If you do, make sure you have time set aside to go try things out — it might take several tries for you to understand the equipment enough to take a photo you like.
Whatever you do, don’t let the equipment stump you and keep you from moving forward. The most important part of your photography is you, and you’ll only get better with practice, no matter what camera you use to do it.
How Do You Become a Good Photographer?
Well, obviously part of the answer is intentional and frequent practice. After all, as the esteemed photographer Henri Cartier-Bresson once said, “Your first 10,000 photographs are your worst.”
Your first 10,000 photographs are your worst. — Henri Cartier-Bresson
But that doesn’t mean there aren’t a few ways to speed up the process.
Here are a few tips that helped me when I first started:
Simplify what you keep in your photo
If there’s a trash can in the way and it doesn’t contribute to the photo you want to take, change something about your angle, distance, or environment to get it out of the frame.
Pay attention to bright spots
Our eyes tend to be drawn to the brightest spots in the photo. Make sure these spots are what you want people to see first.
Keep eyes in focus
When shooting living things, make sure the eyes are in focus. It brings a sense of life to the subject, even if other parts of it remain blurred.
Look in reverse
When searching for something to photograph, look in the opposite direction from how you read. For most of you reading this, that means looking through your environment from right to left. This should help slow you down so you don’t skim past something interesting.
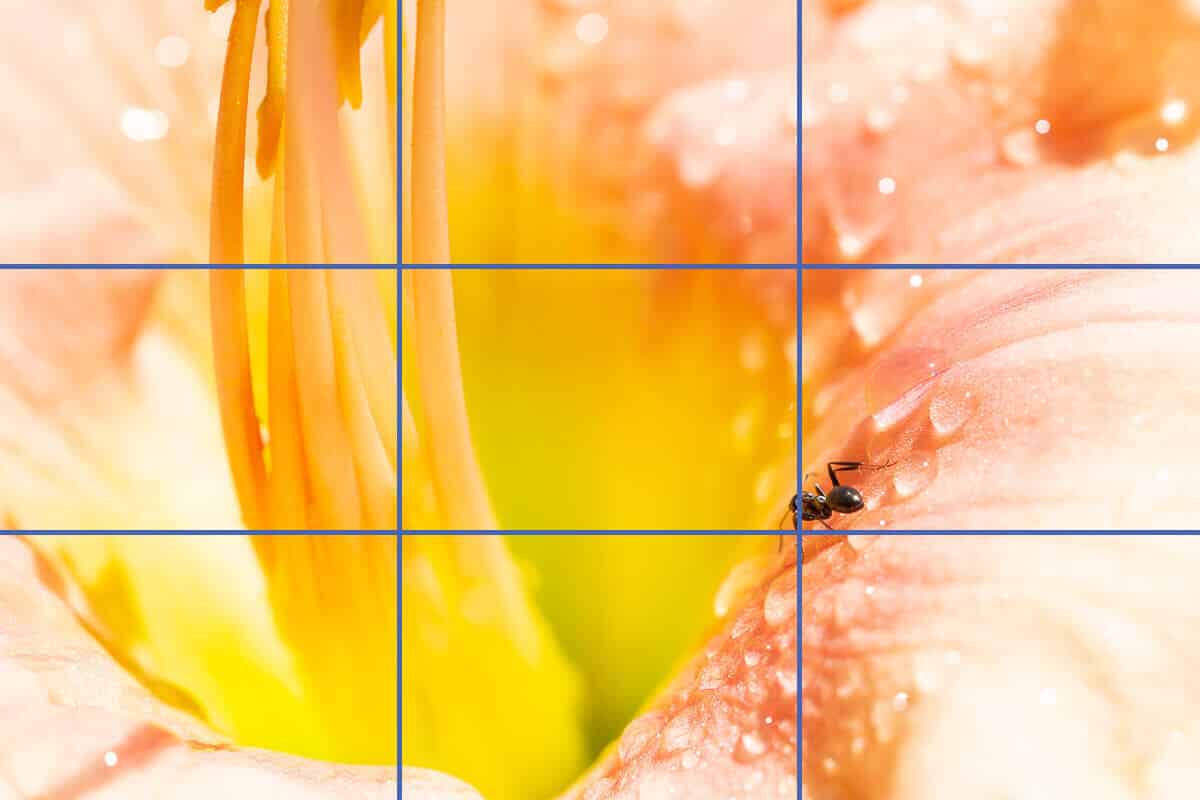
Follow the rule of thirds
If you imagine a tic-tac-toe board over your photo, it often looks nice to put objects near or on the dividing lines. This is especially true where the lines intersect.
Master aperture priority mode before going to manual
If you’re using a DSLR or mirrorless camera, start out using aperture priority mode. On the little wheel that changes camera modes, this will often be represented by the letter ‘A’. This will let you control how much you want in focus and help you blur the background behind a subject, often creating a bokeh effect. You can move to manual mode later if you find yourself wanting to control both aperture and shutter speed at the same time.
Adjust photo brightness with the exposure triangle
Aperture, shutter speed, and ISO all affect how bright a photo will be; together, they form the exposure triangle. Mastering this concept will help you get the light you want in different situations. It seems a bit complicated at first, but with enough practice it’ll start to come naturally.
Delete photos on your computer, not your camera
You’re less likely to make an irreversible mistake.
Past that, I’d recommend taking a local photography class somewhere if you can, or starting out with this photography masterclass on Skillshare.
Now, I may have just listed a bunch of rules for taking better photos, but remember, this is the art world. All rules can be broken if you have a good reason to break them.
As for making sure you practice, I developed most of my photography skills by posting a new photo daily for over 6 months to my Instagram account. It started as a classic 30-day challenge, but I ended up liking photography so much I couldn’t bring myself to stop at 30 days. I gained over 2,300 followers in a little under 8 months and have now had a few of my photos mounted on exhibit walls — small habits can pay off.
In short: go take photos. A lot.
What Other Equipment Do You Need to Take Photos?
Strictly speaking, nothing. If you’re just getting started and don’t want to complicate things, feel free to just walk around holding your camera for now.
As you get more into photography, you may find yourself needing a few more tools to get the photos you want. Most of these are particularly useful for DSLR and mirrorless cameras, but there are situations where a phone or point-and-shoot could benefit from some of them too.
Software
For photo management and development, I can’t recommend any software I’ve tried more than Adobe Lightroom Classic. It can sort and tag photos quite handily, and it’s a fantastic tool for developing and exporting raw photo formats. Affinity Photo is another good option for basic photo development.
If you take JPEG photos (a decent idea if you want simplicity and care less about perfectionist quality or developing your photos), this isn’t as big of a deal unless you want the sorting features.
If you use raw photo formats, which give you much more data to work with when developing your photos, Lightroom is unbeatable. I don’t generally do a lot of development with my own photos, but the automatic lens corrections in Lightroom have always given me exactly what I needed.
As a nice bonus, the Adobe Creative Cloud photography plan comes with the ability to make a free site with their portfolio builder. It does have its limits, though — if you need a bit more control over how your site looks, you can also check out our guides on how to build your own personal website, along with some of the best personal website and portfolio examples we could find.
Gear
- Tripod – If you’re shooting with slow shutter speeds, you won’t be able to hold the camera still long enough to get the photo. Tripods fix this. I use a Sunpak like this one, a SwitchPod, and a Joby BallHead. You can go cheaper, but the more expensive your camera, the more you’ll want it to not tip over. Try to keep your tripod somewhat correlated in quality.
- Remote shutter (or suitable app) – This helps even further by removing the small amount of shake introduced to the camera when you push the button to take a photo.
- Rocket Air Blaster – This has done a fantastic job at getting dust out of my camera and lenses. I purchased it slightly too late, only after realizing an entire vacation’s worth of photos had a visible dust speck in them.
- Extra battery – You don’t want to hike out to the Great Sand Dunes and have your battery die. It’s harder to charge things out there.
- Extension tubes – These will help you try out macro without shelling out for the macro lens I use these days. You’ll need to find out which ones work with your camera of choice, but my extension tubes have served me well at a much lower price. Note that some won’t allow auto focus, so you’ll want to check descriptions carefully.
- Camera bag – Specialized bags can get expensive, but also offer more compartments and padding. On the other hand, I’ve also walked around with my camera in a ~$20 drawstring bag. Use whatever fits the things you need without breaking them.
- Camera strap – I imagine most cameras come with this, which is why it’s last. Please use it. I once dropped a ~$400 lens on a mountainside. I got lucky that day, but things could easily have gone much worse.
What Can You Do with Photography?
Many things! Photography can be a hobby, an art form, and a profession.
Aside from my 30-day Instagram challenge, I’ve had photos in exhibits, and I take custom photos for some of the posts on this site.
If you’re looking to make money through photography, you’d be wise to lean toward headshots, wedding photos, or senior portraits. They’re probably the most direct ways to make money from camera work unless you have helpful connections elsewhere.
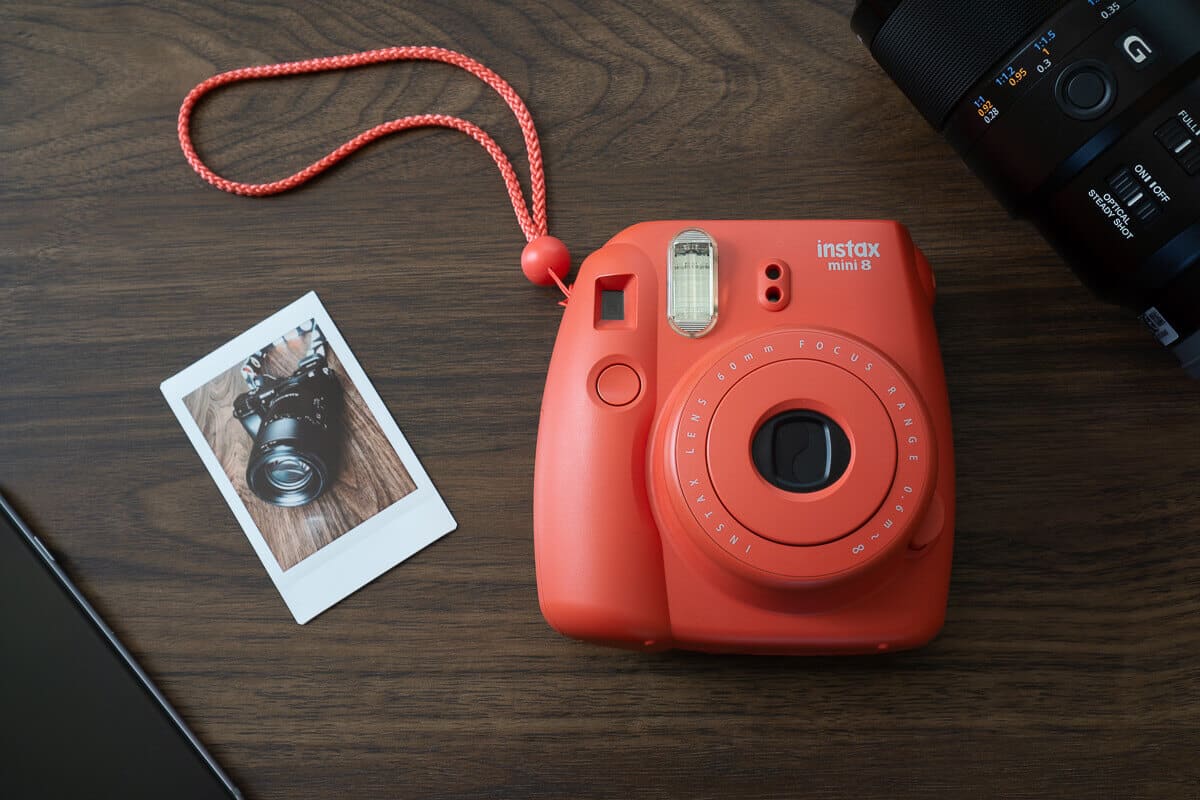
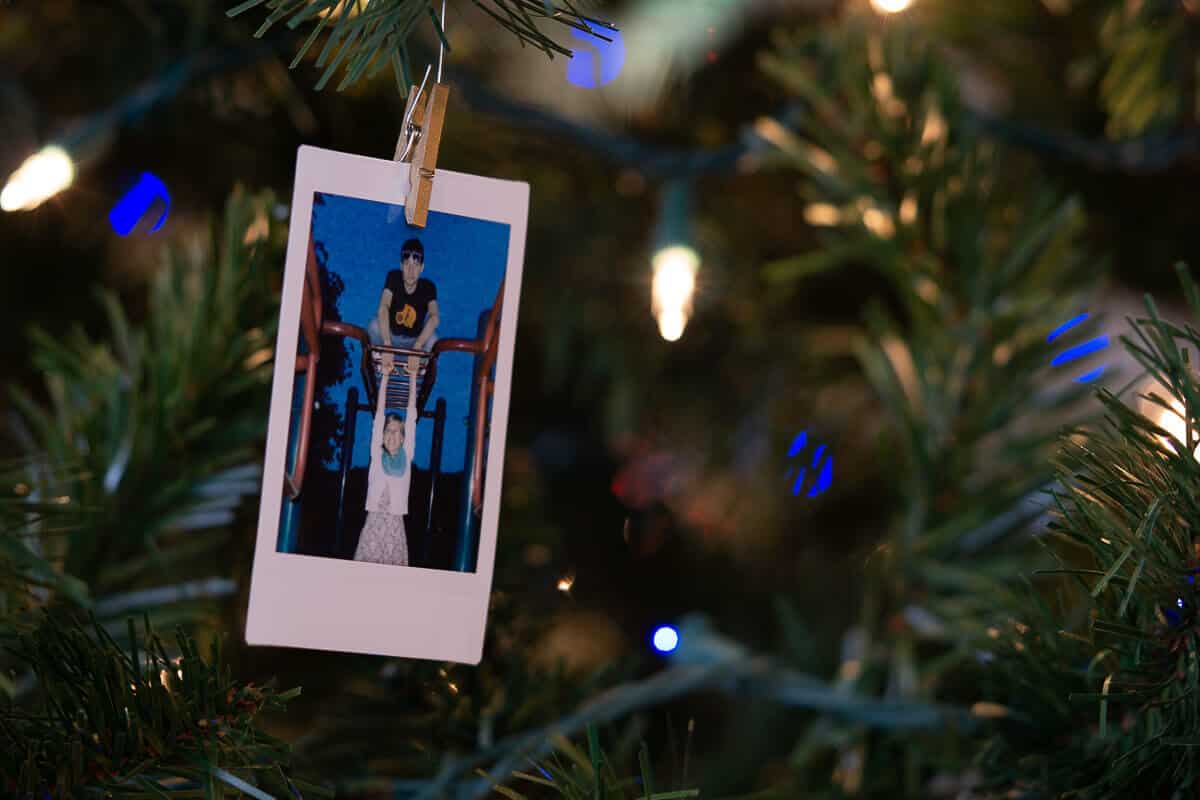
Now, if you’re taking photos to capture moments and memories, I do have one extra use for photos: decoration.
If you use this delightful Instax printer, you can print out your photos on an old-school film sheet. These can be hung on walls, stuck to whiteboards, or used to decorate a Christmas tree.
Go Take Your First New Photos
Don’t wait — use whatever camera you currently have access to and take in the world around you. Nature, architecture, people, food, animals; anything that speaks to you is a perfect subject.
Photography has changed my life. It started as a way to cope with nerve damage taking away piano and video games for a few years, but has become so much more for me. If it can bring you half the joy it’s given me, I think it deserves your attention.
P.S.: If you do get started with this, I’d love to see some of your photos! Feel free to send some my way via Instagram or Twitter.
Photo credits: all