
If you’re like the average person, you probably have several “unofficial” spots for the various files, papers, and documents that make their way into your life.
Your desk is a likely candidate, as is your kitchen table – and, of course, there’s the very bottom of your backpack, where papers go to die and never be recovered.
Well, prepare to kiss your average-ness – and all of the messes in these places – goodbye.
By channeling the combined spiritual energy of Marie Kondo and Leslie Knope, I have created this guide that will show you how to easily organize all of your files, documents, and papers.
We’ll start things off by figuring out which of your files should actually be on paper (rather than on your computer). Then, we’ll talk about how to organize and process those files using the Three-Location System. Finally, we’ll dig into how you can start to digitize your files.
Let’s get started.
Physical vs. Digital: How Should You Store Your Files?
Look, it’s 2019. We’re not writing down our friends’ phone numbers on Rolodexes anymore, and when the phone company leaves a phone book on our doorsteps today, we angrily tweet at them for destroying the environment.
So… should we even be talking about how to organize physical files? Shouldn’t we all be going paperless?
Well, if you’re anything like me, the answer is “mostly yes”.
Whenever I get a piece of paper, my first instinct is to either:
- Recycle it (this happens to most of the mail I get)
- Digitize it… and then recycle (or shred) it
I don’t like keeping a whole lot of paper in my life. I’d much rather store all my files in the cloud, where they don’t take up space and can be accessed on all of my devices.
However, there are certain things that just need to be kept around in physical form. So, until we all figure out how to upload our consciousnesses into computers and adopt a fully-simulated existence (assuming we’re not already doing that now – cue X-Files music), here are some documents you should make sure you keep on-hand:
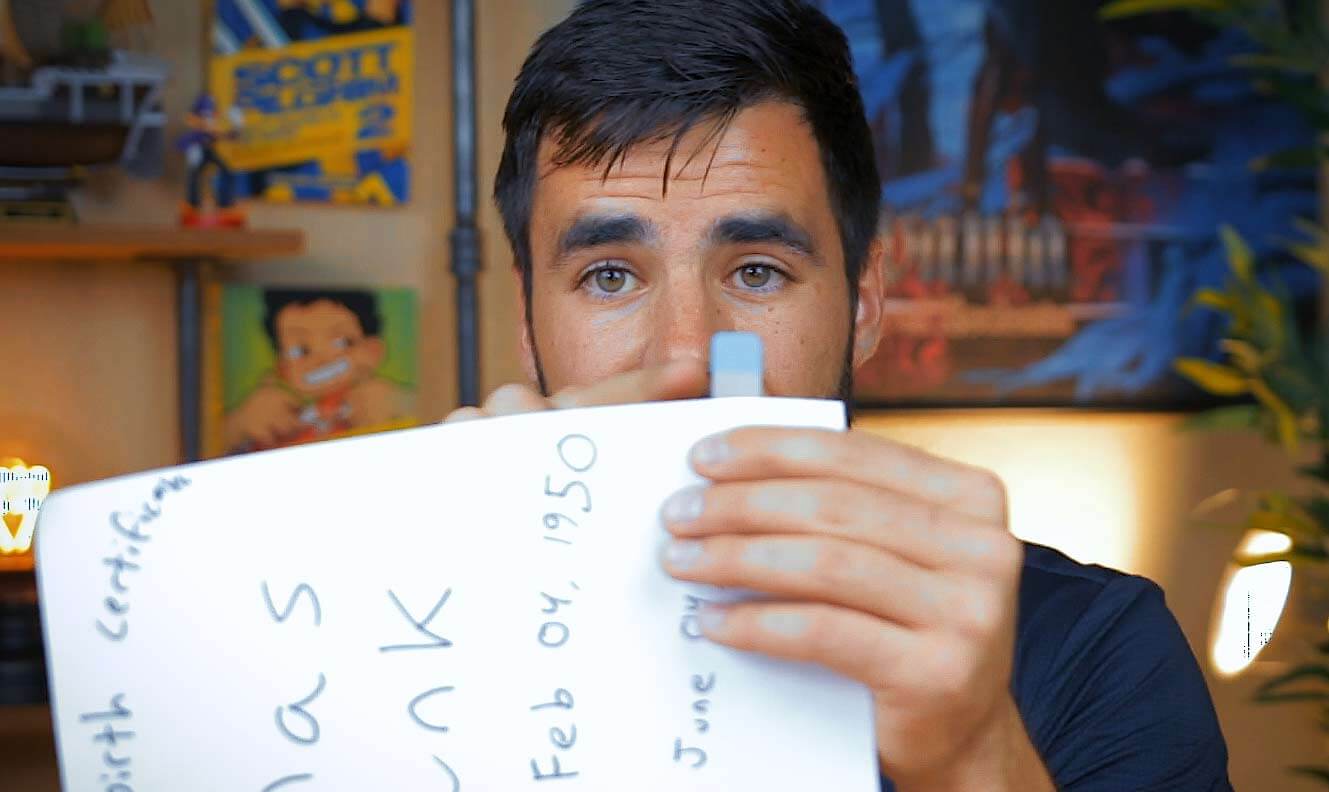
Documents You Need to Keep on Paper
Keep all of these documents in your physical file system:
- ID documents and passports
- Birth certificate
- Social security cards
- Business licenses (if you have a business)
- Marriage license (if you’re married)
- Vehicle titles, loan documents, and registration documents
- House deeds and mortgage documents
- Wills and living wills
If you’re a student, you may not have many of these kinds of documents right now; however, you’re likely to acquire some of them in the future, and you’ll want a safe place to keep them.
Additionally, you might want to keep around certain sentimental documents – clippings of newspaper articles you were mentioned in or wrote yourself, extra-special birthday cards, crayon drawings from your little brother – that kind of stuff.
Whatever it is, use the following system for organizing and storing it.
The Three-Location System for Organizing Files
When it comes to organizing physical files, I use a simple system that consists of three locations:
- Main file box
- Inbox
- Portable file folder
There are a couple of other optional locations you can add to your system (which I’ll cover later), but these three will cover the vast majority of your needs.
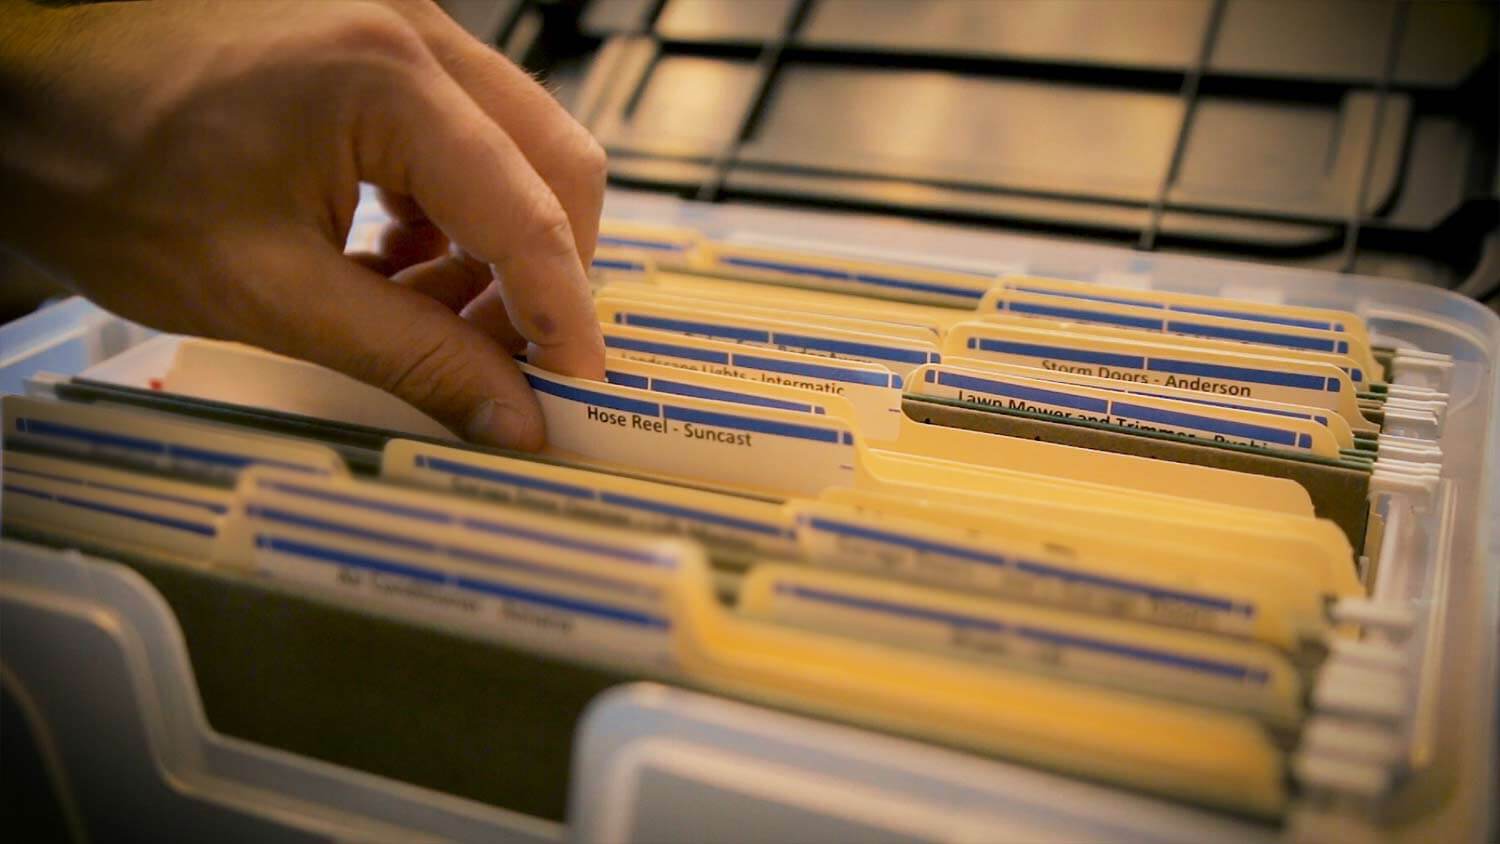
Main File Box
The main file box is the place where the majority of your physical files should eventually end up (if you’re not going to digitize them).
If you have a lot of papers you need to store, you could buy a multi-drawer filing cabinet for this purpose; however, I find that a single file box is more than enough for me.
This file box is built to store hanging folders, each of which gets a label. Most hanging folders come with labels included.
Now, when you’re creating your structure here, it’s a good idea to try to adhere to the “tree” structure you used for your digital files.
Use each hanging folder as a top-level folder. This might be all you need; if you’re like me, you won’t have a ton of physical files and won’t need to go deeper.
If you do need to go deeper, though, you’ve got a few options. The first is to simply put multiple regular folders within your hanging folders.
I actually do have an example for this; my landlord left an entire file box with the house I’m renting because she is supremely organized (honestly, she should be writing this article instead of me).
Each hanging folder is just a letter of the alphabet; in each one is a folder for each piece of the house – the garage door, security system, refrigerator, etc.
Another method is to use pieces of printer paper as dividers, and then to attach sticky flags to the edges of each one in order to create labels that stick up from the rest of your papers.
You could also use thicker construction paper if you wanted these dividers to feel more substantial than your normal papers.
This method isn’t quite as nice as using folders-within-folders, as that method allows you to take out a specific folder when you need to work with it. It is, however, cheaper – and it takes up less space.
Inbox
Be honest with me here: When you get a piece of mail that needs to go into your file box, how often do you immediately open up that file box and put it in the correct spot?
I’d wager a guess that it’s not 100% of the time, and that your kitchen table if often used as a convenient place to toss things that will get “dealt with later.”
Here’s the thing: This is fine. You probably shouldn’t be opening up your file box and finding the exact folder for each file you get at the exact moment you get it. It’s a lot more efficient to have a specific time blocked out for processing all of your unorganized files, mail, cryptic messages written in cut-out magazine letters and nailed to your door, etc.
However, your kitchen table does not deserve to be a dumping ground for all of these things in the mean time. That is a job for your Inbox.
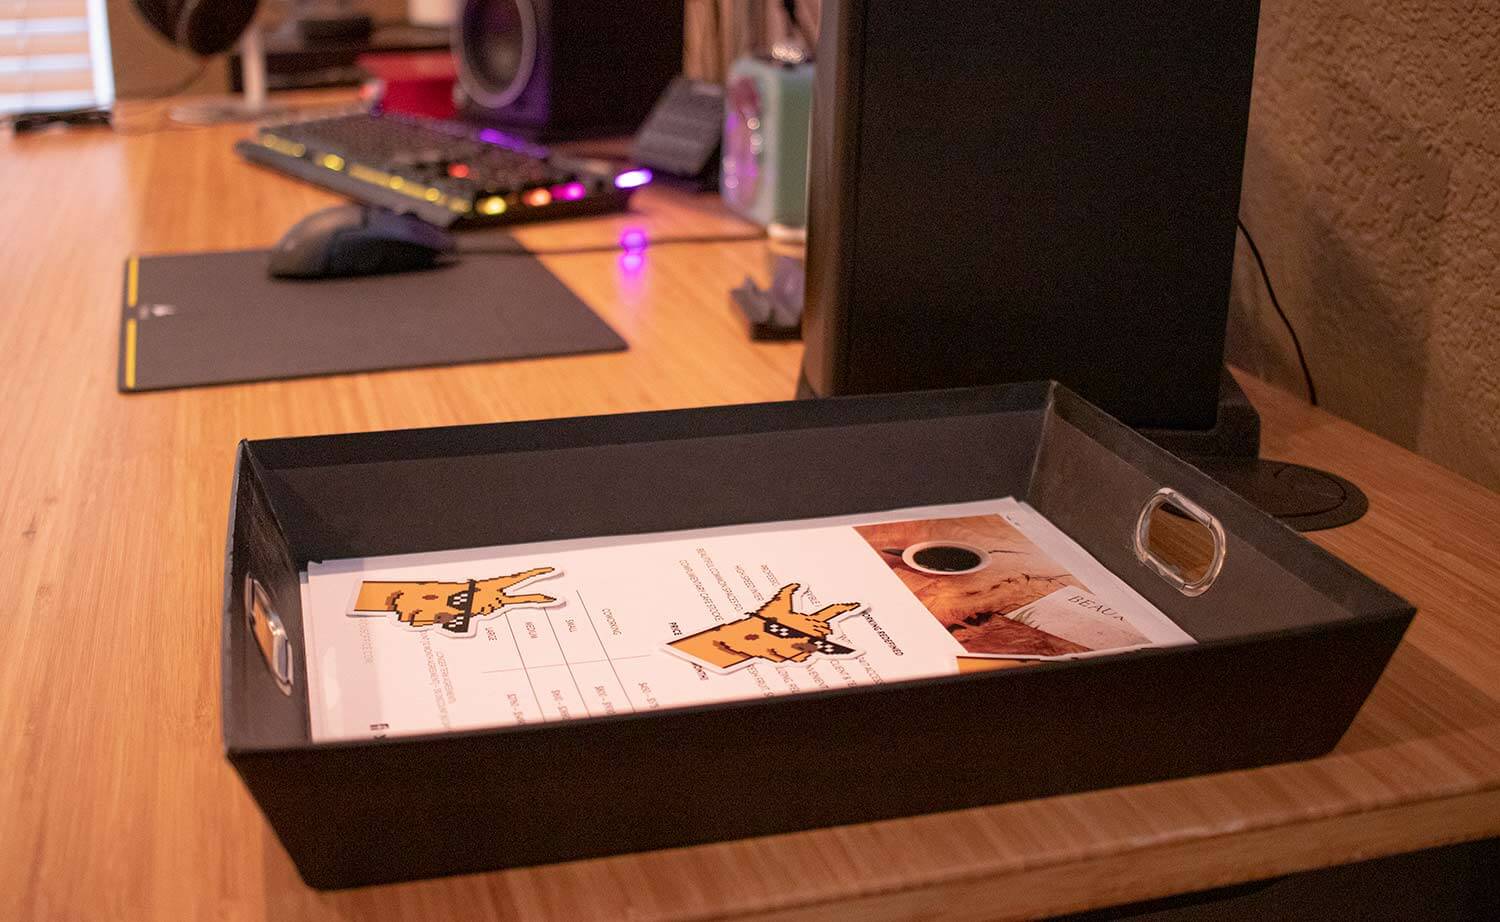
An inbox is a simple tray (or stack of trays if you want to get fancy) that sits on your desk. Whenever you get something that needs to be processed later, you put it in the inbox. There it will wait for processing.
At least once a week, go through everything in the inbox and decide what needs to be done with each piece – deal with it (if it represents a task, like a water bill), digitize it, recycle it, or put it into your main file system.
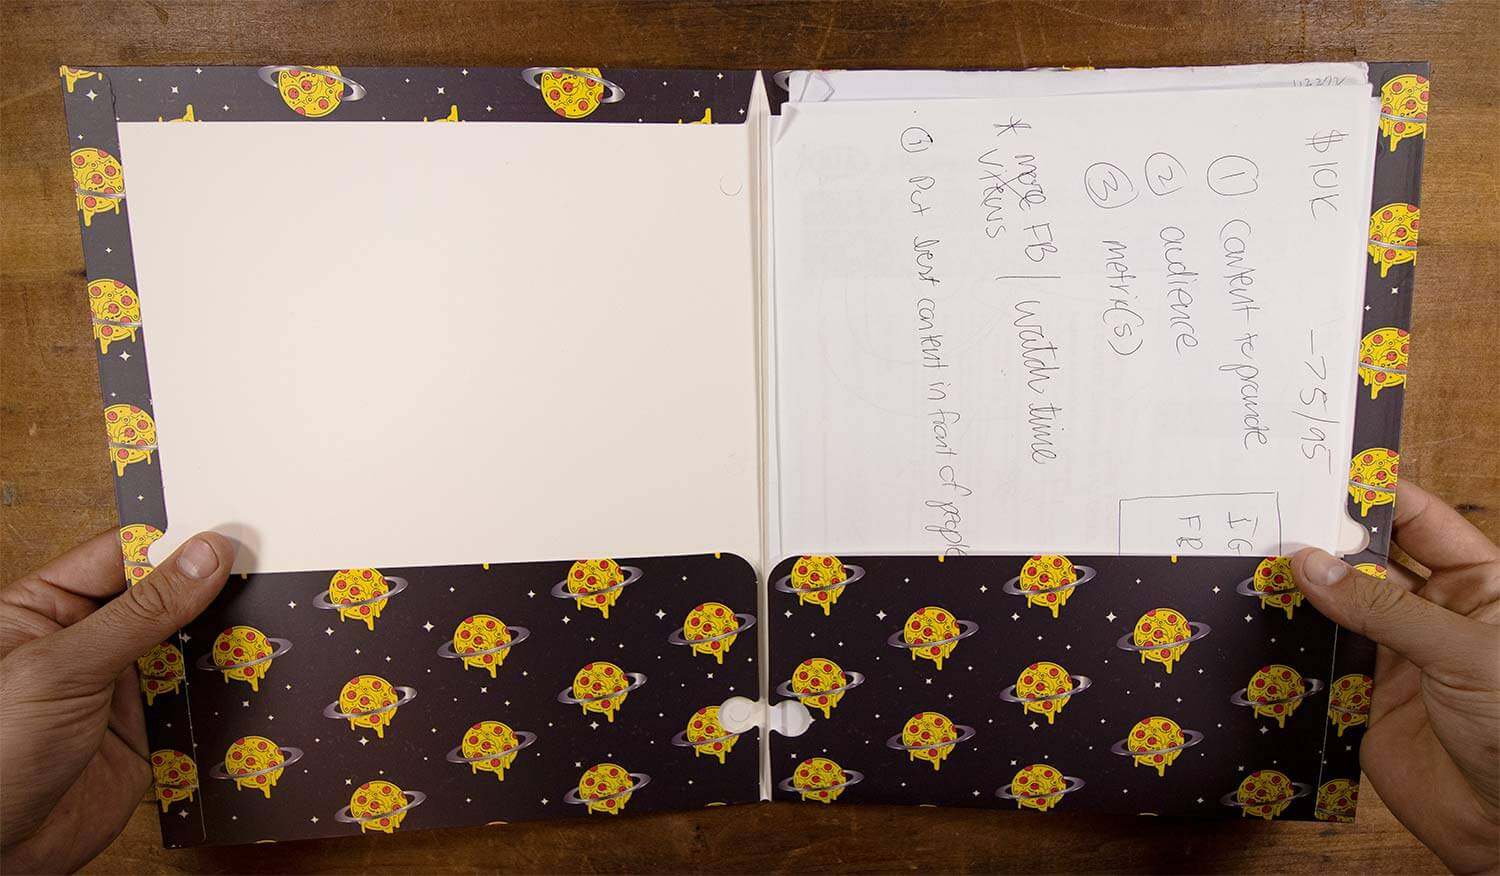
Portable File Folder
The final piece of your physical file organization puzzle is the one that travels with you.
When you’re out of the house and away from your file box and inbox, you still need some way to store with any papers you get at work, class, or from that guy outside your local coffee shop holding his “The End is Nigh” sign.
Now, depending on the type of work you do and classes you attend, your portable file folder can function as either a portable inbox (which you clear on a regular basis) or a mini file box that actually holds papers for a significant amount of time.
If you’re anything like me, you don’t have any physical papers that you need to carry with you. You might carry a physical notebook (maybe you’re a bullet journal user) or a novel, but you’re not actually carrying worksheets and other papers.
If that’s the case, then I recommend keeping a single folder in your bag and using it as a portable inbox. This gives you a safe place to temporarily store any papers you get while you’re out and about, and it doesn’t take up much space.
When you get home each day, you can move any papers and end-of-the-world pamphlets you received to your main file box, your inbox, or the recycle bin.
But what if you’re a student who needs to carry around assignments and handouts?
Or what if you’re a high-powered, slick-haired business person who needs to carry around, ya know, business papers?
If this is the case, then a single folder probably isn’t going to cut the mustard. (Actually, the edge of a folder is more than capable of cutting mustard – but I digress)
Instead, look at getting a portable accordion folder (I recommend this one from Five Star). These come in tons of different designs, from ones that just have a close-able flap to ones that zip up and have built-in tabs for labels.
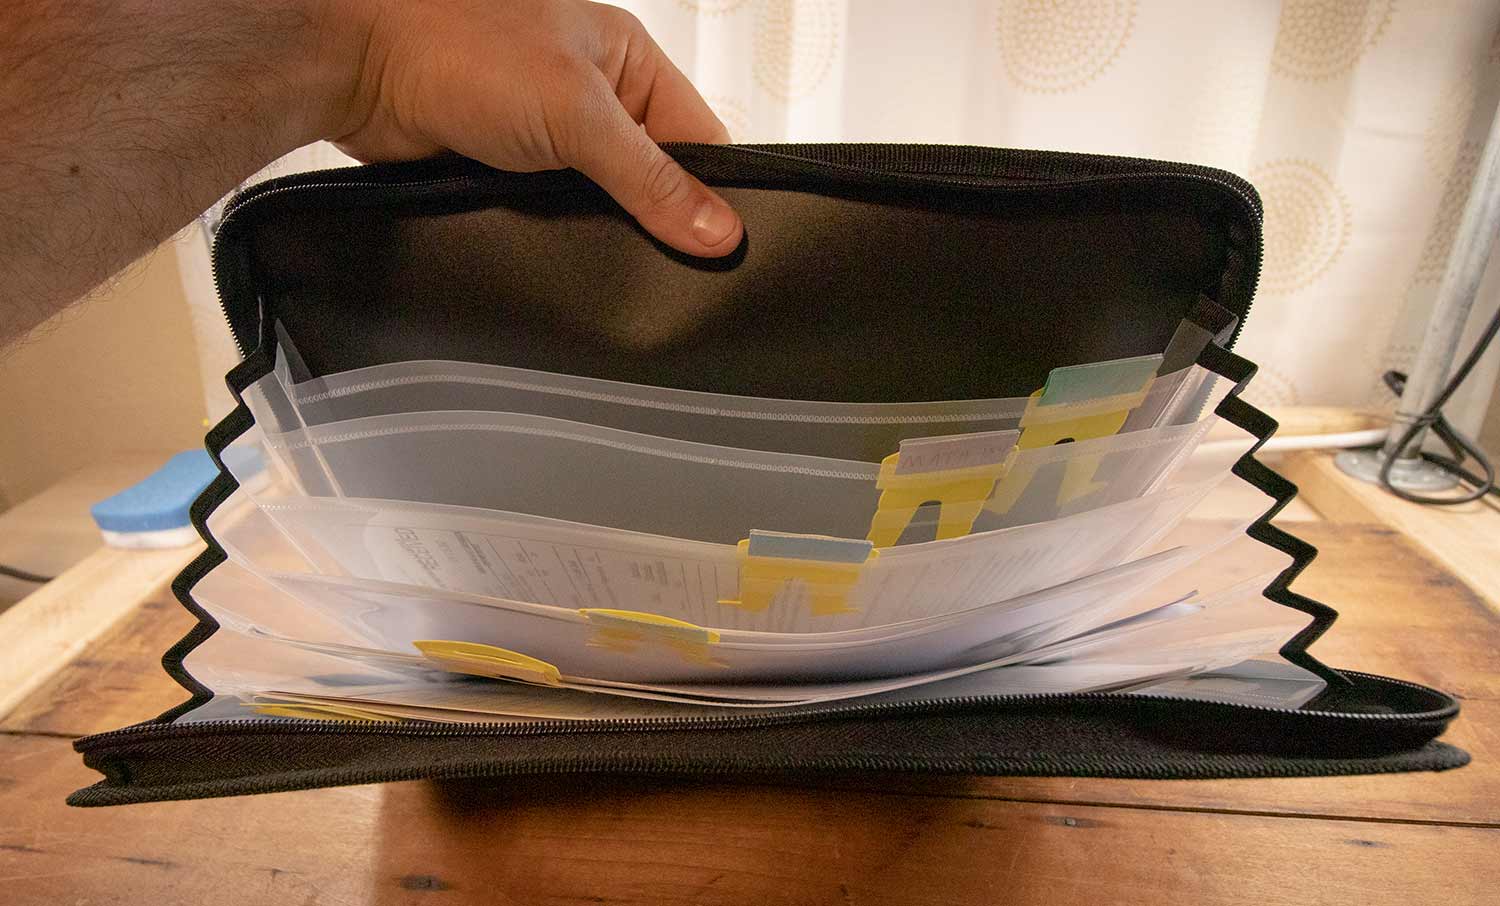
All of these have one thing in common: They give you several folders in one slim, compact package, which means they act as a portable file box that you can work out of.
You can easily separate and organize all the different papers for your classes or Very Important Business Deals, and unlike old-school binders with a hard spine, they expand or contract based on how much you’re carrying.
Optional File Locations
The Three-Location System will most likely be all you need for the vast majority of your files, especially if you decide to start digitizing most of them. However, there are a few potential exceptions. Here I’m going to cover a couple that you may want to consider.
Manuals Box
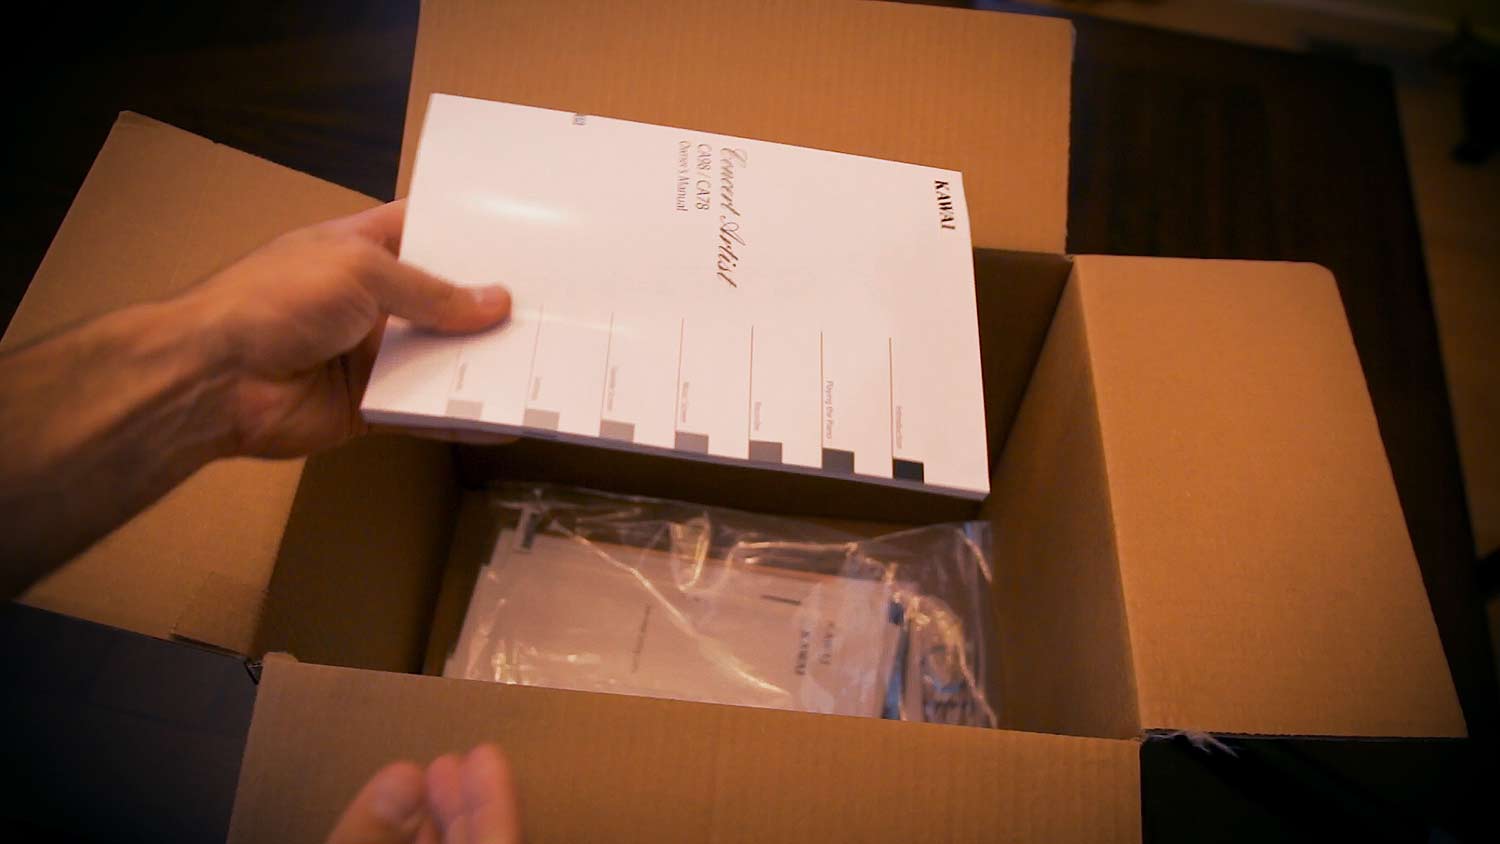
One type of physical “file” that I almost never digitize are product manuals. I have manuals for my lawn mower, digital piano, camera, and various other things I’ve bought. These are often pretty thick, so they’d take up a lot of space in my main file box if I tried to store them there.
That’s why I also have a “manuals box”. In my case, it’s just a cardboard box in my basement where I store the manuals for the things I buy. It’s not very organized. Whenever I buy something and think I should keep the manual, I just toss it in the box.
Of course, you can be organized with your manuals box – in fact, my landlord’s file box is, indeed, a hyper-organized manuals box. When I eventually own my own home, I’ll be building a similarly organized manuals box.
For now, though, the number of manuals I own is small enough that a single box – without folders – works just fine.
Remember, sometimes over-optimizing one tiny part of your life takes so much time that your life in general becomes less optimized.
Safety Deposit Box
For your very sensitive documents, man. Safety deposit boxes can be rented at most banks for a yearly fee, which can vary from bank to bank and location to location.
There are also companies that focus only on safety deposit boxes, and you might find them to be cheaper. One that I found here in Denver rents small boxes for $125 a year.
Personally, I don’t use a safety deposit box. For important documents, I have backup scans. However, I also live in a house where I feel my documents are fairly secure.
At other times during my life, though, I lived in dorm rooms with roommates who would often leave the door unlocked – or wide open. If you’re an a similarly insecure living situation, a safety deposit box might be a wise investment.
Organizing your paper files is a great example of analog productivity. For more analog productivity advice, check out this article.
How to Go Paperless: Digitize Your Physical Files
To round out this guide, I want to talk about something that’s even better than properly storing and organizing your paper files; namely, digitizing them and then removing the physical versions from your life.
That’s right: It’s time to adopt the (mostly) paperless lifestyle.
Digitization is the process of scanning your physical files and turning them into electronic images or PDFs. From there, you can easily slot them into your beautifully-constructed computer folder system, where they:
- No longer take up any space in your home or backpack
- Can be backed up and rendered invulnerable to fires, bullies, or escaped zoo gorillas
- Are searchable (if you save them as PDFs, or…well, read on.)
Personally, I try to digitize almost every paper I get. Unless I’m dealing with a thick product manual (and can’t find a PDF online to replace it), it takes very little time to digitize a paper.
This is especially true now that almost everyone has an ultra-high-resolution camera built into their phone. In the past, the only easy ways to digitize papers were to either buy a scanner or go down to a Kinko’s or Staples and scan documents there.
Now, you can just use your phone – which means you can digitize handouts, receipts, and other papers wherever you are.
Additionally, if you’re using the right app, you can automatically send your scans into your file system.
Here’s how I digitize my files. First, I’ll note that for the most part I prefer to send all my scans into my Evernote account rather than my actual file system. If you’ve taken my productivity systems course (which is free using that link), you might know that I use Evernote as a second brain.
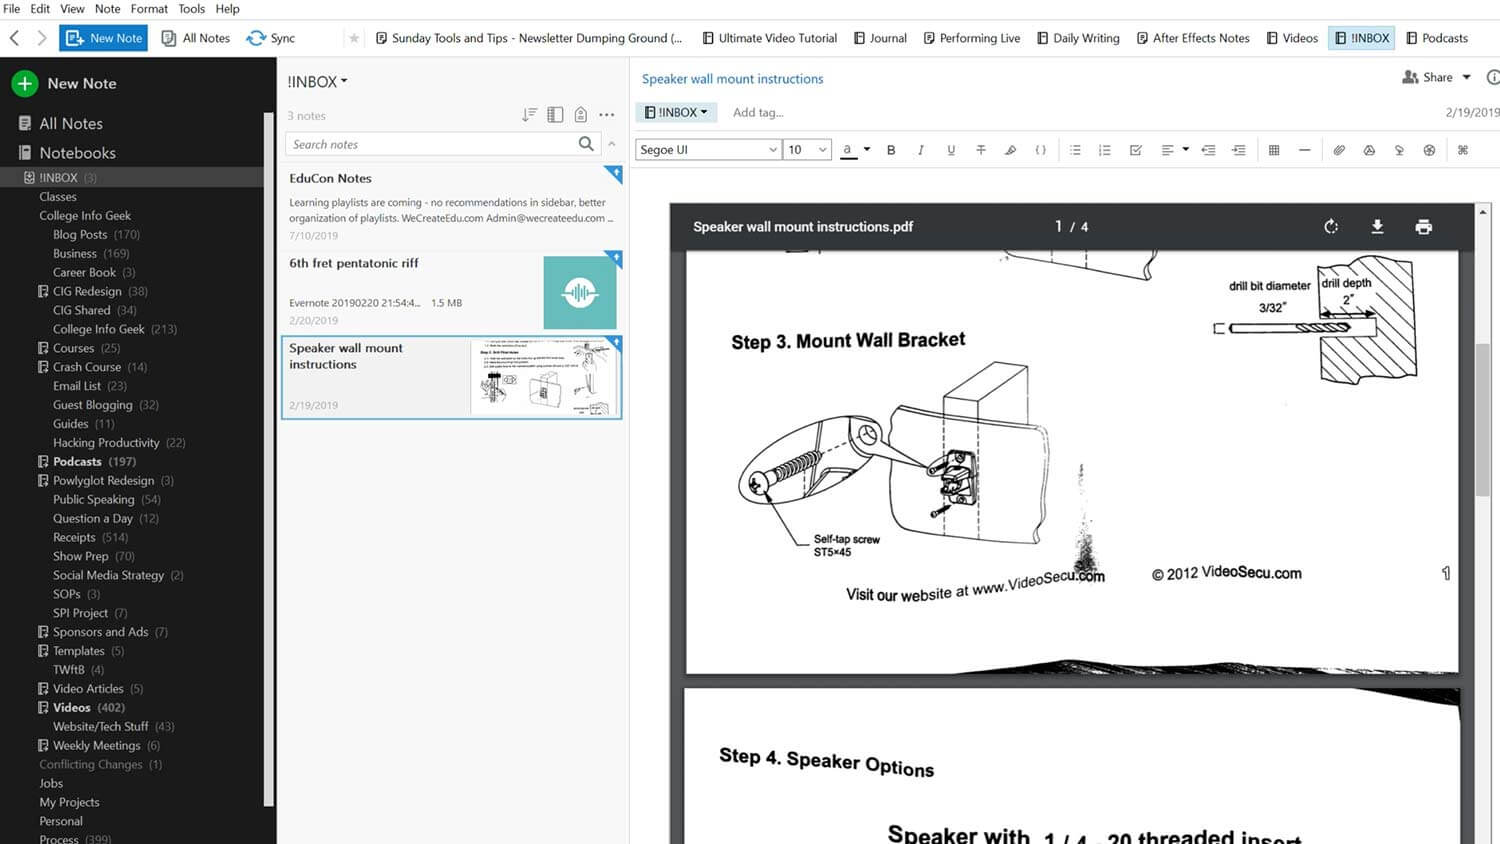
All of my article research, book notes, recipes, journal entries, and other ideas go into Evernote. (Note that there are other options – Check out our Top 10 Note-Taking Apps in 2020 list to see the best ones.)
Since Evernote’s UI allows me to see the contents of an individual note right next to all my notes and notebooks (instead of forcing me to open things up in a separate program), I find it to be a much more efficient place to store ideas. That’s why I choose to send scans there as well.
There’s another reason, though – Evernote makes your scans searchable, even if they’re images.
I tend to upload my scans as PDFs, but you can also add pictures into Evernote and its optical character recognition algorithm will allow you to search any text in them (even if it’s handwriting).
The Best Free Document Scanner App
With all that being said, I actually don’t use Evernote’s built-in scanning tool to digitize the papers that I get.
Instead, I use an app called Scanbot (iOS | Android).
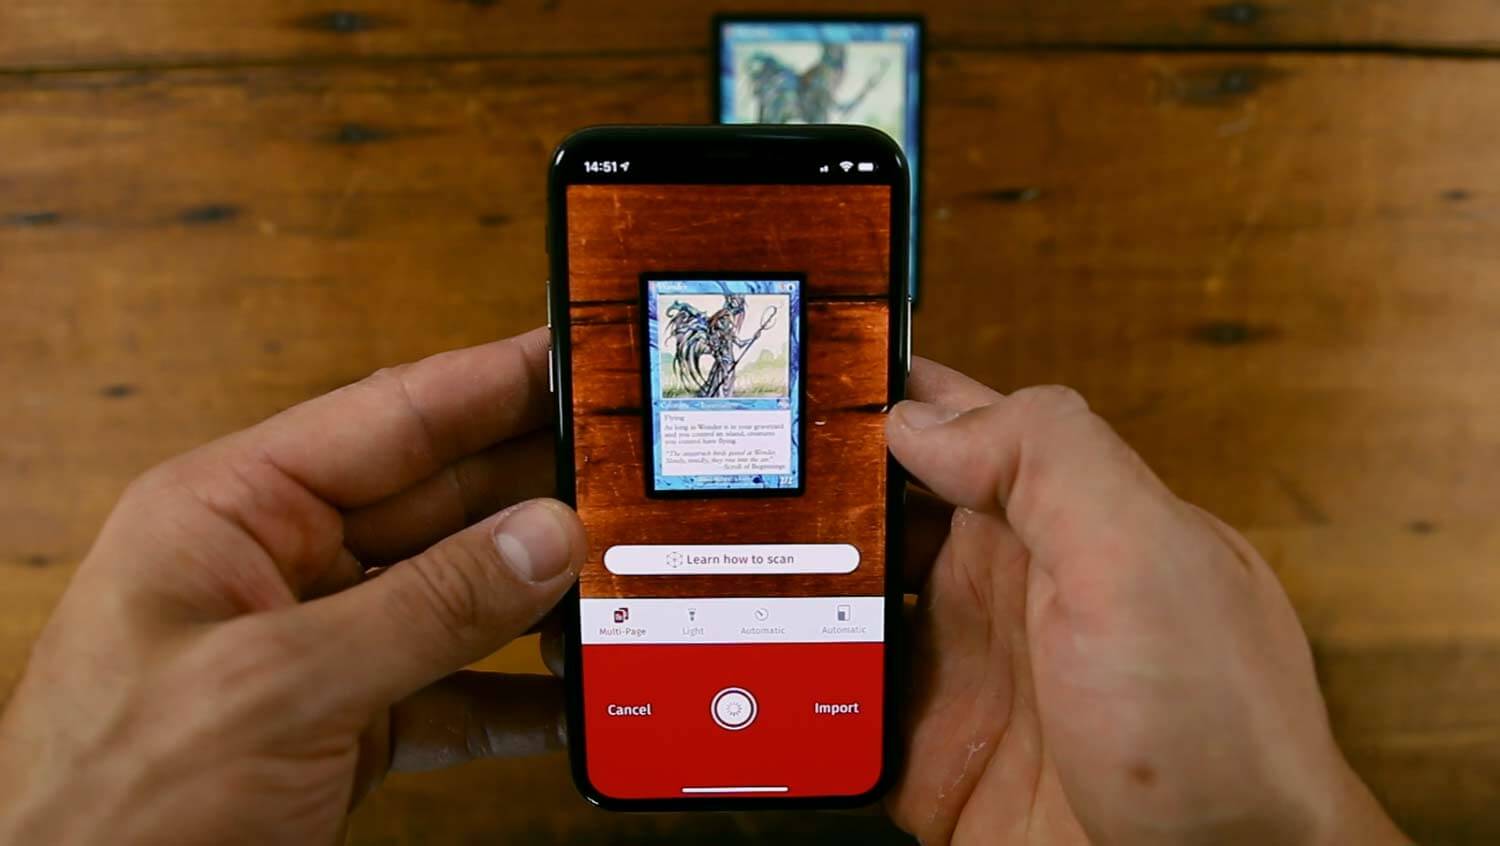
I’ve found that Scanbot’s ability to quickly detect the edges of a piece of paper (or business card, or receipt, or a Magic: The Gathering card) is much better than Evernote’s, and you’re also able to scan multiple pages at once – when you’re done, the app can stitch them into a single PDF.
These features make scanning much faster, but there’s another reason I like Scanbot so much: The automatic upload feature.
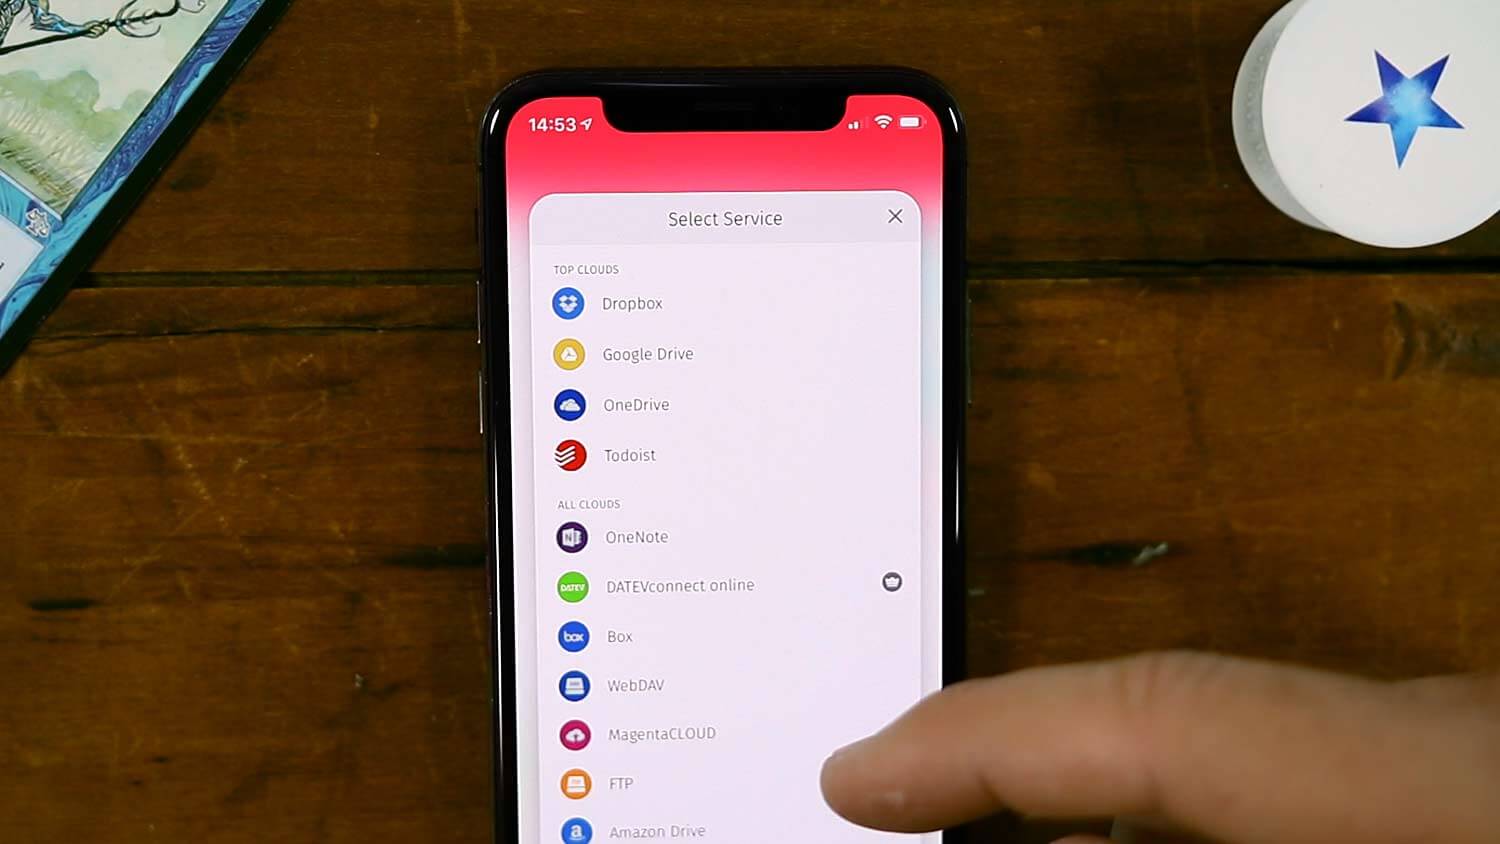
Within the app’s settings, you can choose a destination to which all new scans will be automatically uploaded. Destinations include:
- Evernote (the one I use)
- Google Drive
- Dropbox
- OneDrive
- OneNote
- Lots more, even including FTP and WebDAV
Moreover, you can choose a specific upload folder or notebook for most destinations. In Evernote, I’ve set mine to a notebook called !INBOX, which is also the place where I create most new text notes (I’ve named it with a “!” symbol so it sits at the top of my notebook list).
Scanbot does have one significant drawback: The Pro version has become quite expensive in recent months.
As a result, I’m planning on testing other scanning apps in the near future and updating this guide with a new recommended pick. In the meantime, check out this list for some alternatives.
Note: If you’re using a document scanner app that sends scans to Evernote, Google Drive, Dropbox, or some other cloud-synced app, then your digitized files will be reasonably backed up. However, you should make sure that they are. If your scans only exist on a single computer hard drive, they could be lost in an instant if that hard drive fails.
Create an “Inbox” Folder on Your Computer
I want to make one final note on digitization: If you choose to upload your digitized files to your computer’s native folder system, instead of an app like Evernote, then it might be a good idea for you to create an “Inbox” folder on your computer.
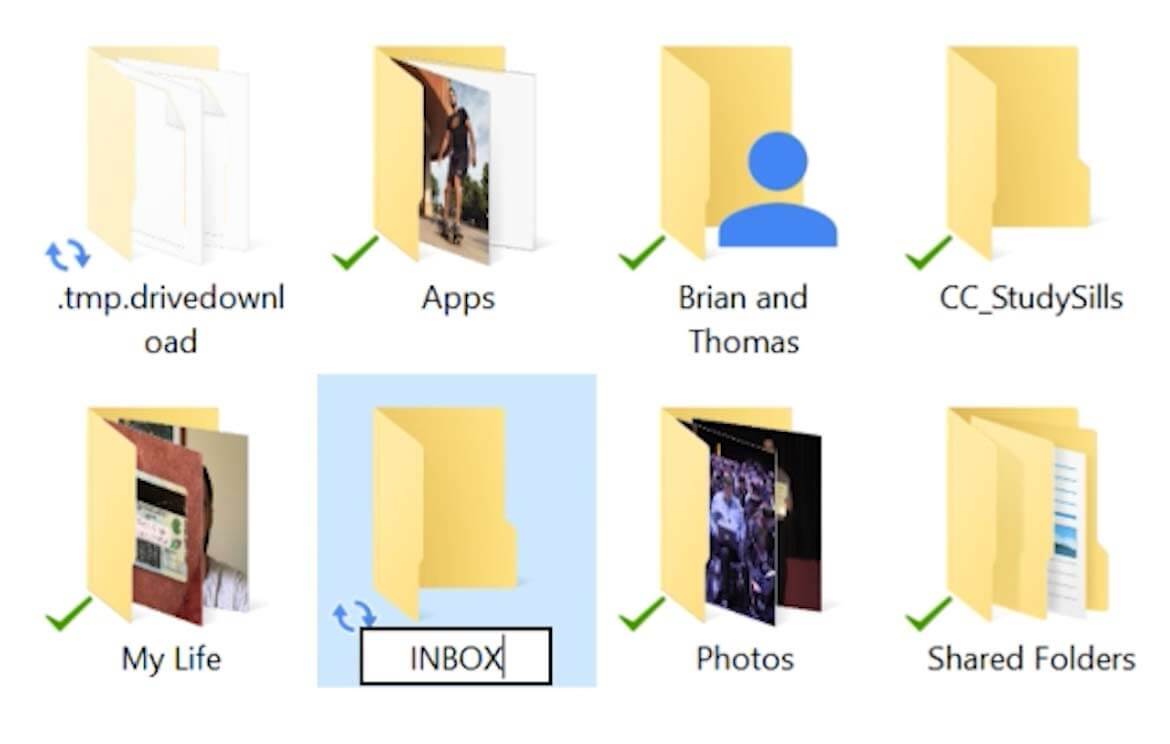
Some people actually use a digital Inbox folder just like a physical inbox, saving all new files to it and then relocating them later on. I don’t do this for a couple of reasons:
- Most of my frequently-accessed folders are pinned to my Quick Access sidebar, so opening them doesn’t take much time.
- A lot of my work involves video editing, and video projects are full of footage, images, music and other documents. Changing the file locations for those assets can break a project.
However, using an Inbox folder for your automatic scan uploads is a really good idea, because it allows you to scan a document in seconds and move on with your life. You don’t want to be standing around in the grocery store, digging through folders in Google Drive in order to find the right one for that receipt your just scanned.
Instead, sit down once a week and process the inbox folder, just as you would do with a physical inbox. This is exactly what I do with my !INBOX notebook in Evernote as well.
When you work this way, you efficiently batch all your sorting tasks, removing as much friction as possible from the multiple times during the week when you might choose to scan a document.
Shred Sensitive Documents
Now, once you’ve digitized a document, you’re probably going to want to get rid of the paper version. You’ve got several options for doing this:
- Recycle it – this is the best option for most things.
- Throw it away – if you want to prove that “End is Nigh” guy right and harm the planet.
- Burn it – check your local fire laws and current bans, and don’t burn glossy stuff! Here’s a guide if you really want to do this.
- Eat it – if you’re a goat, you’ve already done this.
However, you should know that certain unsavory characters have been known to dig through trash and recycle bins, looking for paper that contains personal information they can steal. Don’t let your personal information fall into the hands of these unscrupulous opportunists.
Whenever you digitize anything containing account numbers, your social security number, financial data, or other personal information, make like a Ninja Turtle villain and shred it afterwards.
I use a cross-cut shredder, which is more secure than a basic strip-cut shredder since it cuts paper into small pieces instead of long strips that can easily be pasted back together (the American Embassy in Tehran learned this the hard way back in the 1970s and 80s).
It’s not too expensive, and you can keep it in a sort of always-on mode so that it instantly starts shredding when you feed in a piece of paper. And it’s definitely less work than dealing with having your information stolen! Speaking of that, you might want to listen to our podcast episode on digital security practices as well.
Organization is a Long-Term Process
As you’re probably aware, simply setting up a system for organizing your files isn’t enough: you have to actually use it.
Once you’ve finished implementing everything from this guide, make sure you actually take the time to properly organize new documents when you get them. Put them in your inbox or portable file system right away, then process them on a regular basis.
Additionally, it can be helpful to have a schedule task – once every 3-4 months, say – to go through your file system and make sure it’s working order. If anything is out of place, put it back in its place.
This process will help keep “entropy” (or chaos) from creeping into your file system – ensuring that you always know where everything is.
If you want to get even more organized, check out these articles: